Yes, you can build a custom search for any custom post type!
Delve into this topic on the Internet and you will get the impression that creating this kind of search involves considerable coding in PHP.
However, building a custom search for any custom post type is also possible without adding a single line of PHP. You simply need to use the Toolset plugins.
This tutorial teaches you how to create a custom search for cars using the Divi theme, Toolset, and the Toolset for Divi plugins.
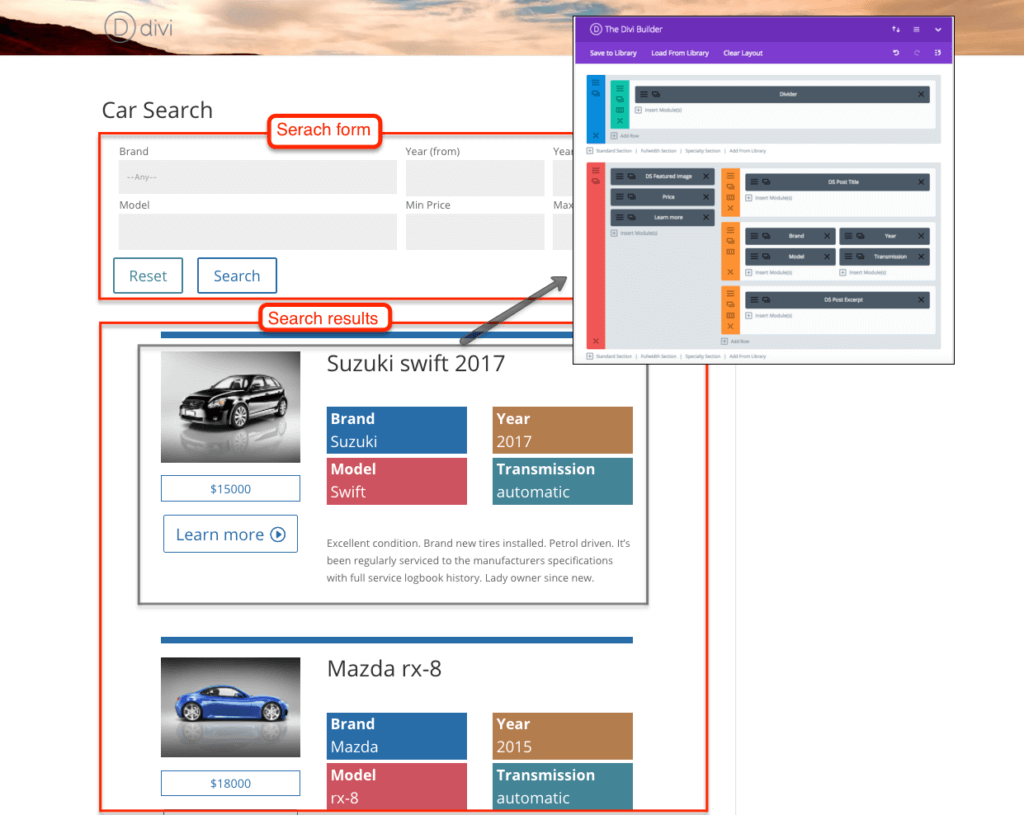
Car search created using Toolset, Divi, and Toolset for Divi plugins.
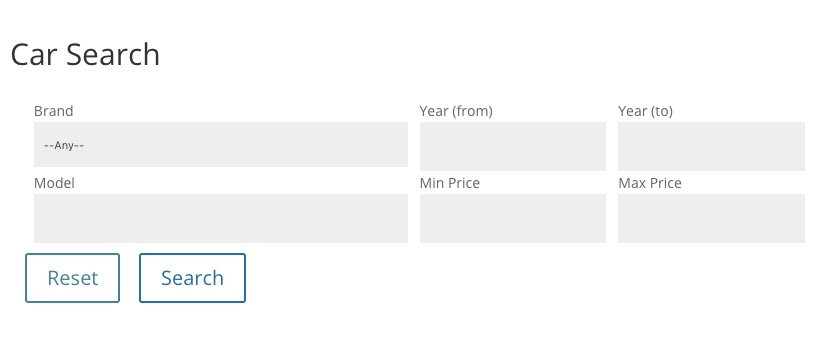
Users fill out input fields such as the car brand, model, price, and year range, and the result will be a list of cars matching their searching criteria.
In our example, we will use the Car post type. Note that the method we illustrate here can be applied to any other post type: job offers, events, products, etc. You can also use fields of your choice as filters.
What you will need
- WordPress site with the Divi theme installed.
- Toolset plugins:
- Toolset Types plugin, used to create a custom post type and custom fields.
- Toolset Views plugin, used to create a search.
- Toolset for Divi plugin by Divi Sensei, used to add and style both post and custom fields through the Divi interface.
High-level steps
Creating a search does not simply come down to creating only the search itself. When creating a new search, we must first set up its structural components. This is performed in Steps 1-3 shown in the following diagram:
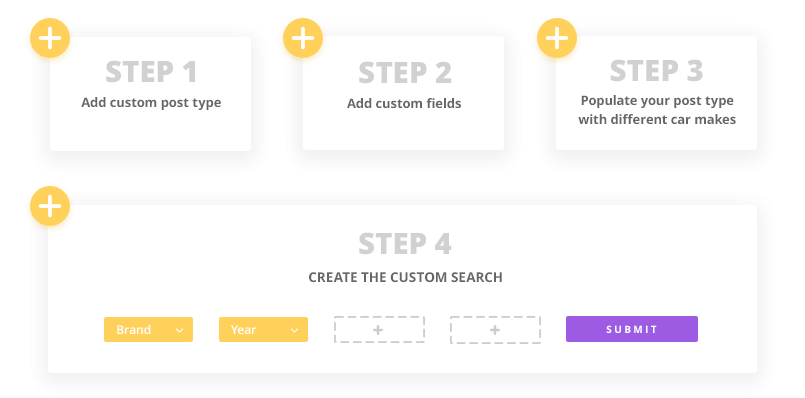
Creating a custom search using Toolset: high-level steps.
Creating a search involves the following steps:
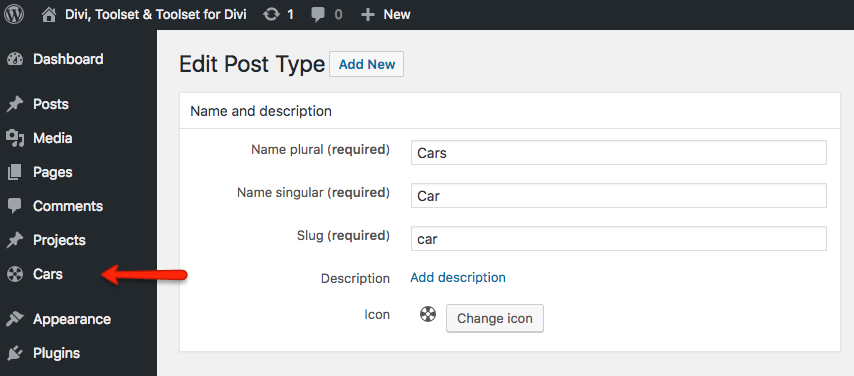
1. Create a custom post type (Cars) using the Toolset Types plugin.
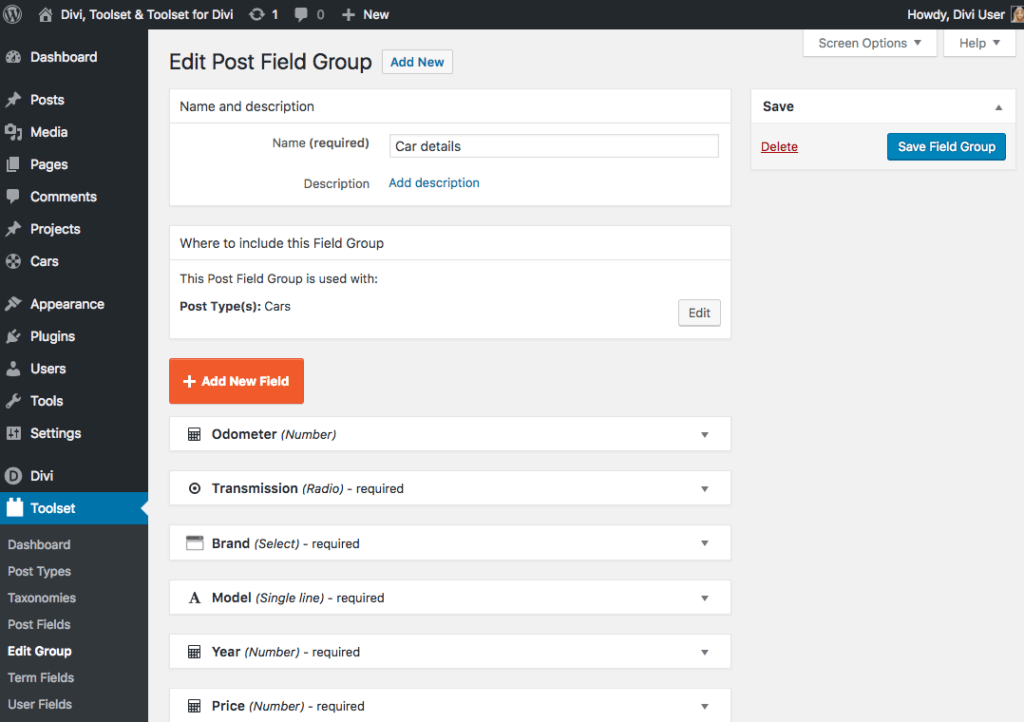
2. Add custom fields to your Cars post type also using the Toolset Types plugin. These fields define the car to be searched: brand, model, price, etc.
3. Populate your Car post type with specific data. For example, add a few cars so that you have some examples on which to test your search.
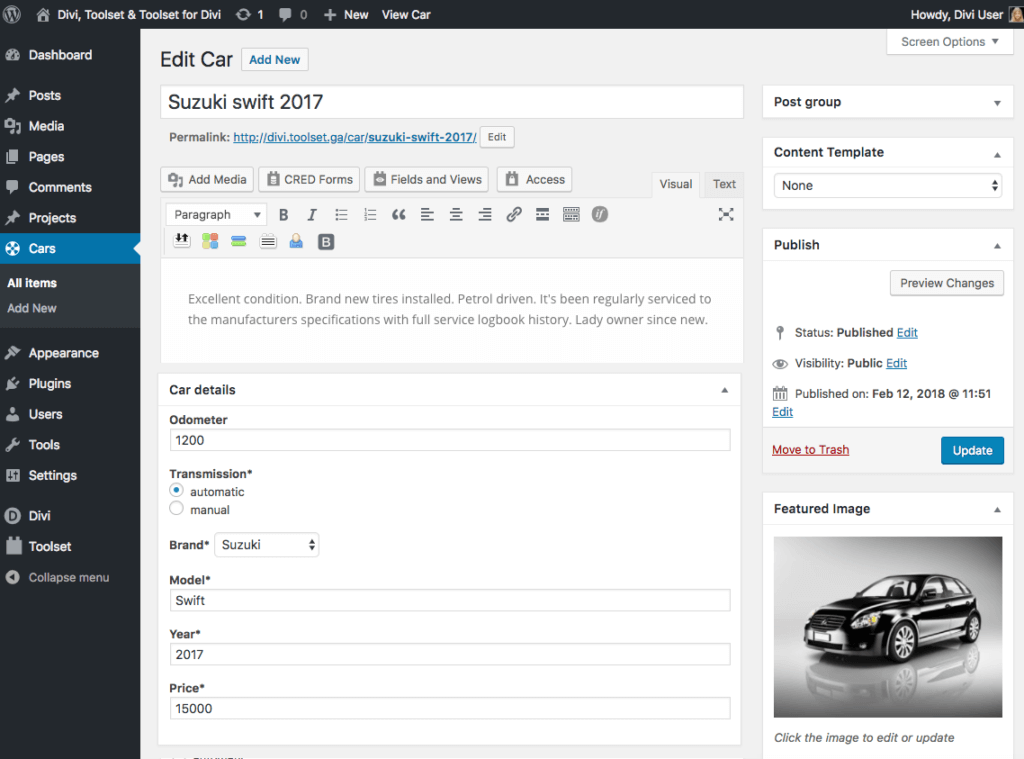
4. Create the search View using the Toolset View and Toolset for Divi plugins.
Understanding the architecture of a custom search
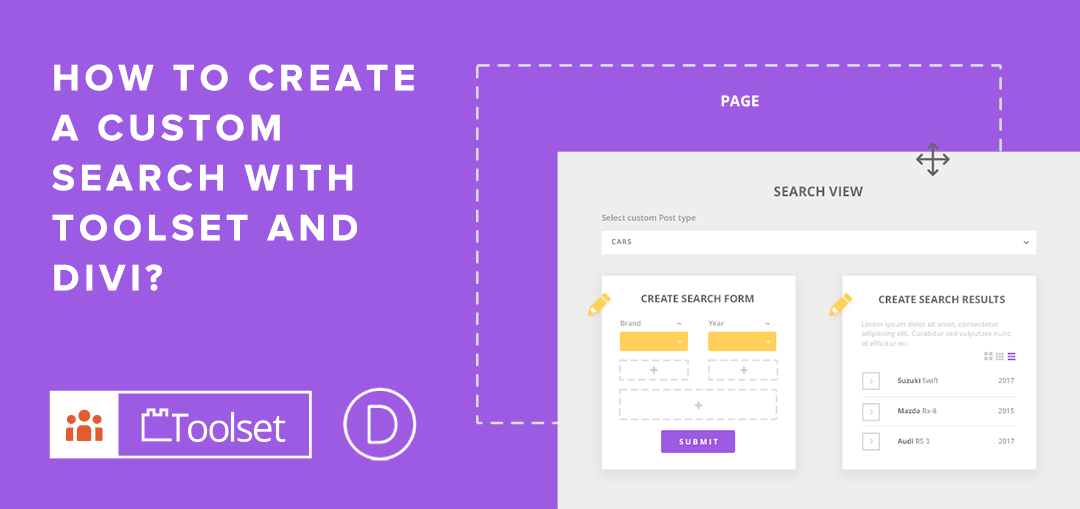
A search in Toolset is a special kind of View, which in addition to displaying certain posts (cars in our example) includes a search form.
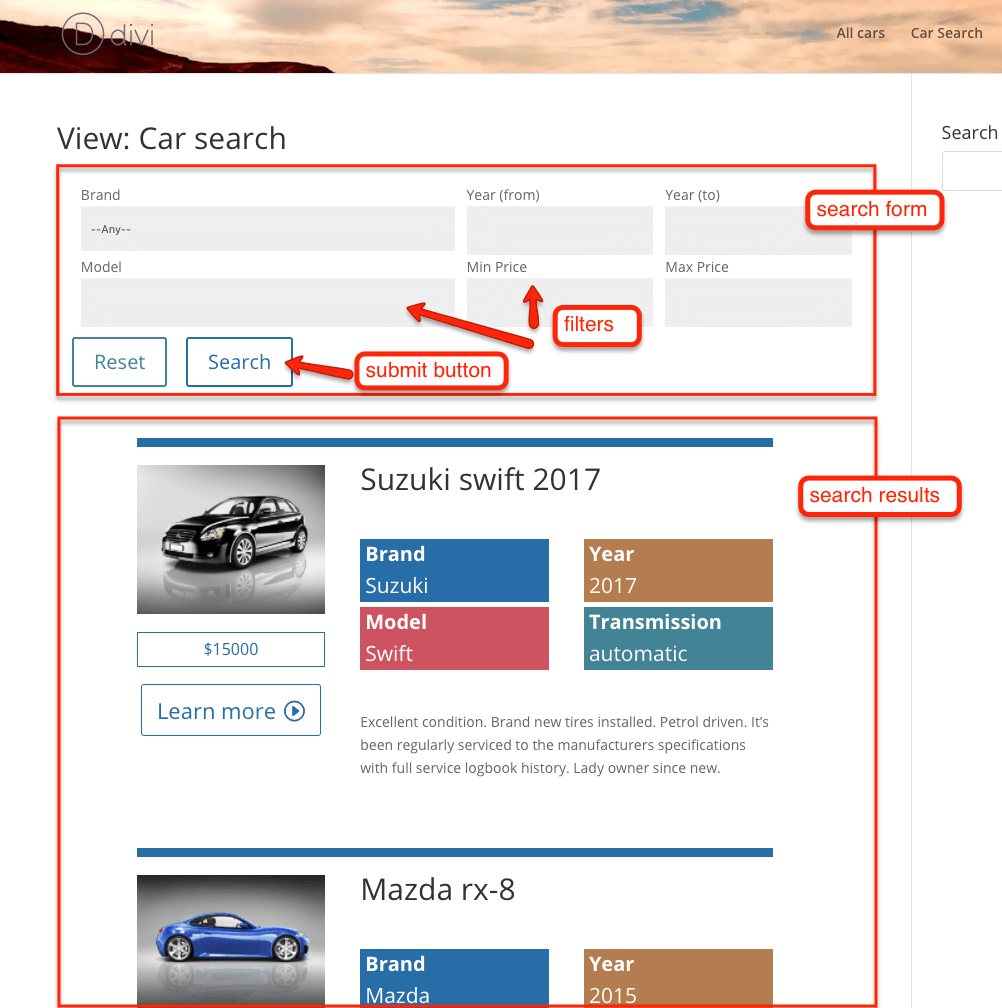
Architecture of a custom search built using Toolset and Divi.
Thus, a search created using the Toolset Views plugin consists of two main parts:
- Search form
- Search results
The Search Form includes Filters and a Submit (search) button.
Filters are input fields that visitors can use to specify their search criteria.
The Search results display the posts found in the search.
Creating the Search View
In Toolset, a list of certain posts (e.g., cars) is called a View.
In our case, we need a special kind of View, which in addition to displaying cars also includes the search form. We call this the Search View.
Once your Search View is created, you can insert it into any page.
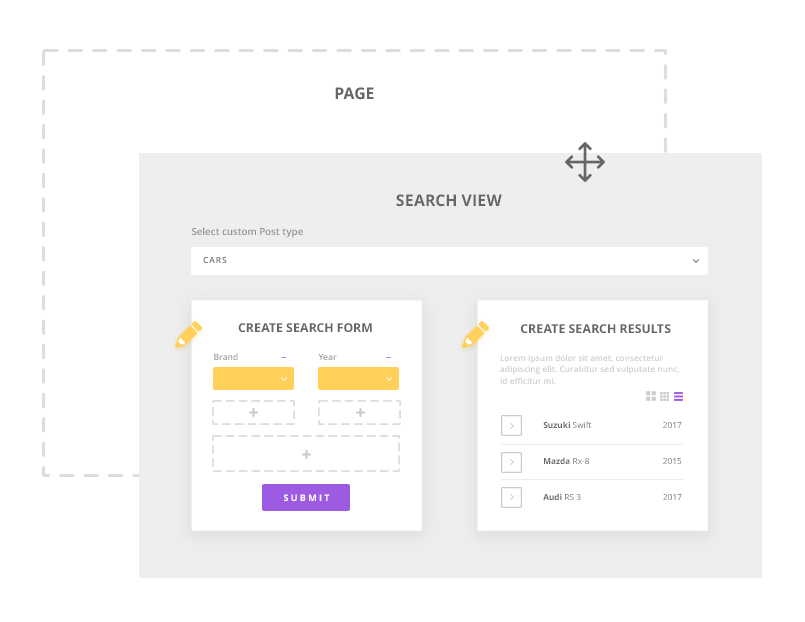
Process of creating a search using Toolset plugins.
Thus, the steps of creating your Search Views in Toolset are as follows:
- Create a Search View
- Select the post type on which your View will operate (cars in our example).
- Design your search form.
- Design your search results.
- Add a new page and insert your View into the page.
In our example, we start by displaying the search results so that we can immediately see some sample output. We will create the search form later.
1. Create a View and select Cars as the main Post type:
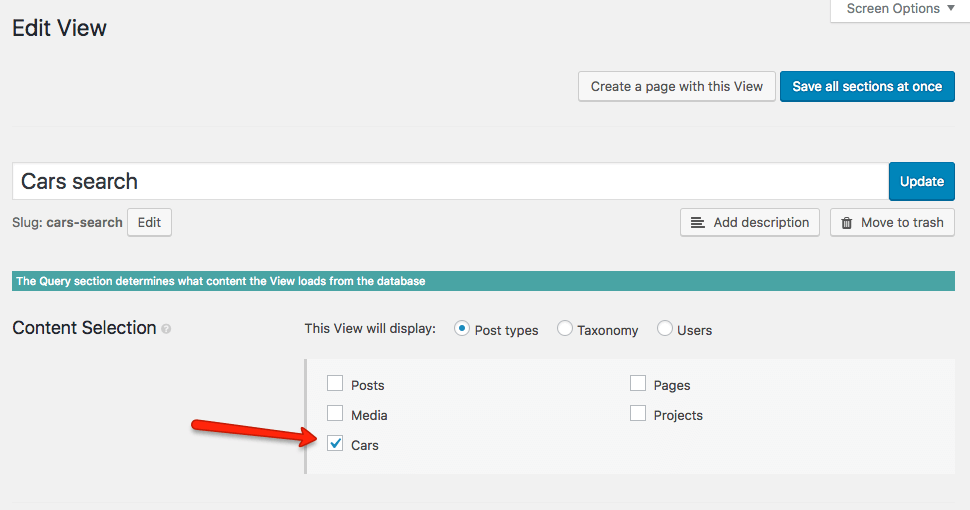
Selecting a custom post type for the search View in Toolset.
2. In the Loop Output Editor, design how your search results will be displayed (as a simple list, table, grid, etc.). In our case, we want to create a custom layout that we will design further using Divi. This is why we next select the unformatted option.
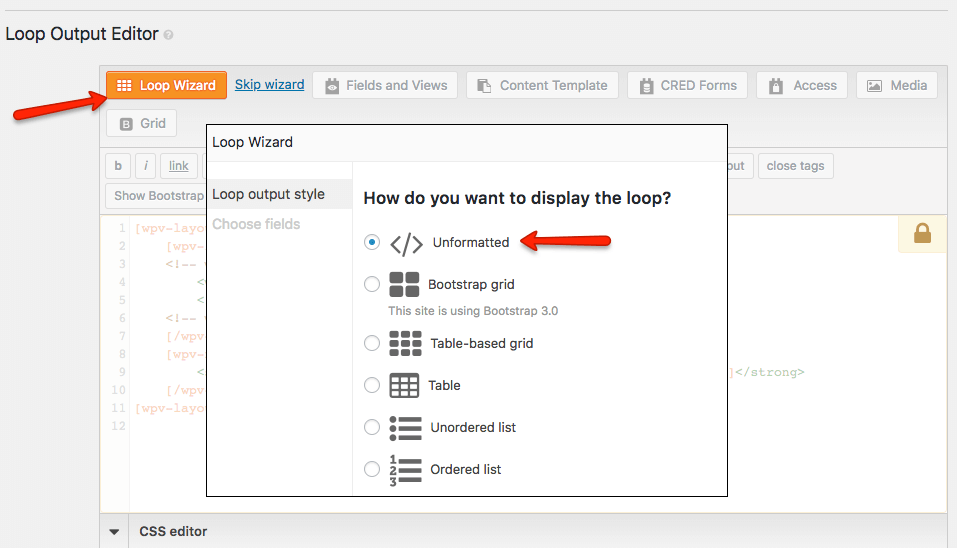
Selecting the output for search results.
3. When you design the output of a single post, you can switch to Divi Builder.
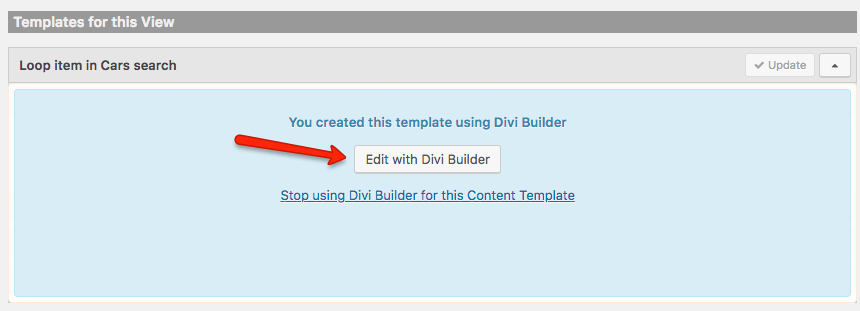
Switching to Divi Builder.
Designing the post entry layout using Divi
The Divi editor opens. Here, you can design your single car entry using Divi Builder.
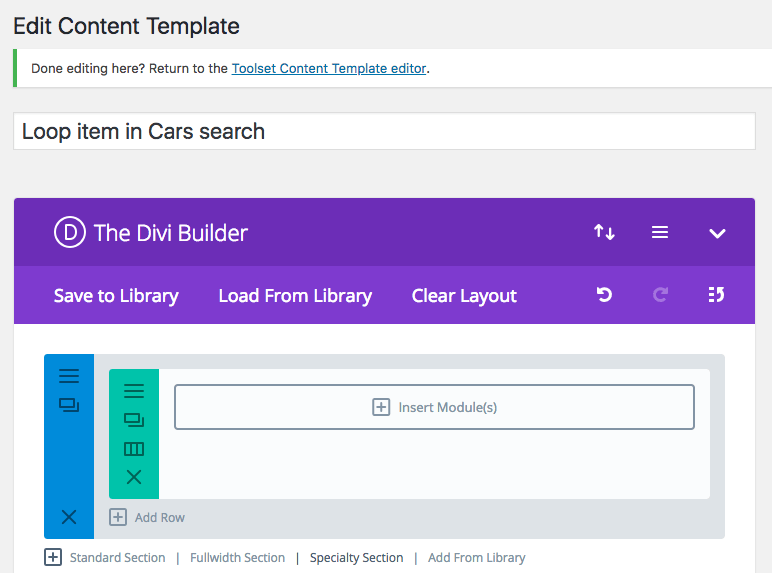
Designing the single car post through the Divi interface.
The goal is to create an output that will appear similar to the following:
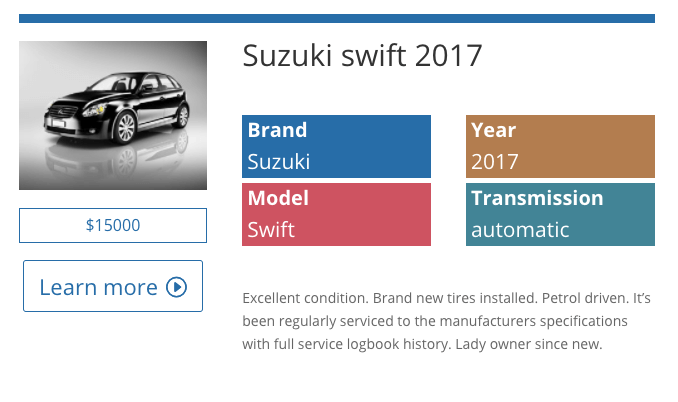
How we want our single car entry to appear on the front-end.
When you insert a module with the Toolset for Divi plugin active, you will see some additional modules, which are highlighted with Sensei icons.
By using the Sensei modules, you can add your post fields (such as a featured image, post title, and post excerpt) as well as custom fields to your output in a straightforward manner. Another advantage of using the Sensei modules is the ability to stylize the layout of your output using the Divi interface.
Let us review some examples.
Inserting custom fields
Use the DS Toolset Textfield module to add your custom fields (such as car brand, model, and price) to your layout.
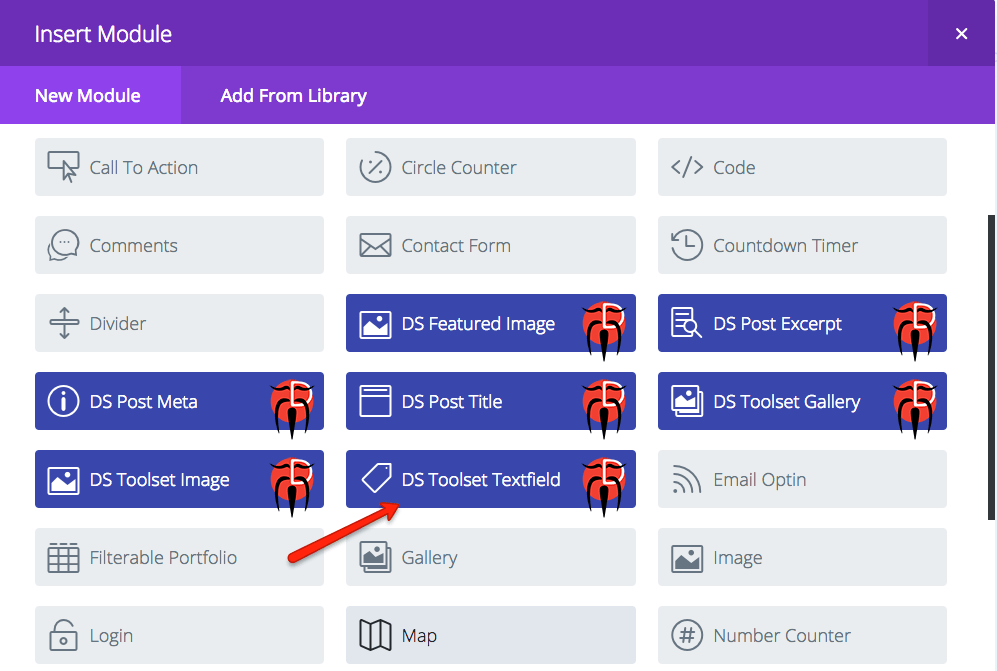
Use the DS Toolset Textfield to add custom fields to your output.
To insert the Brand custom field, locate the field in your dropdown:
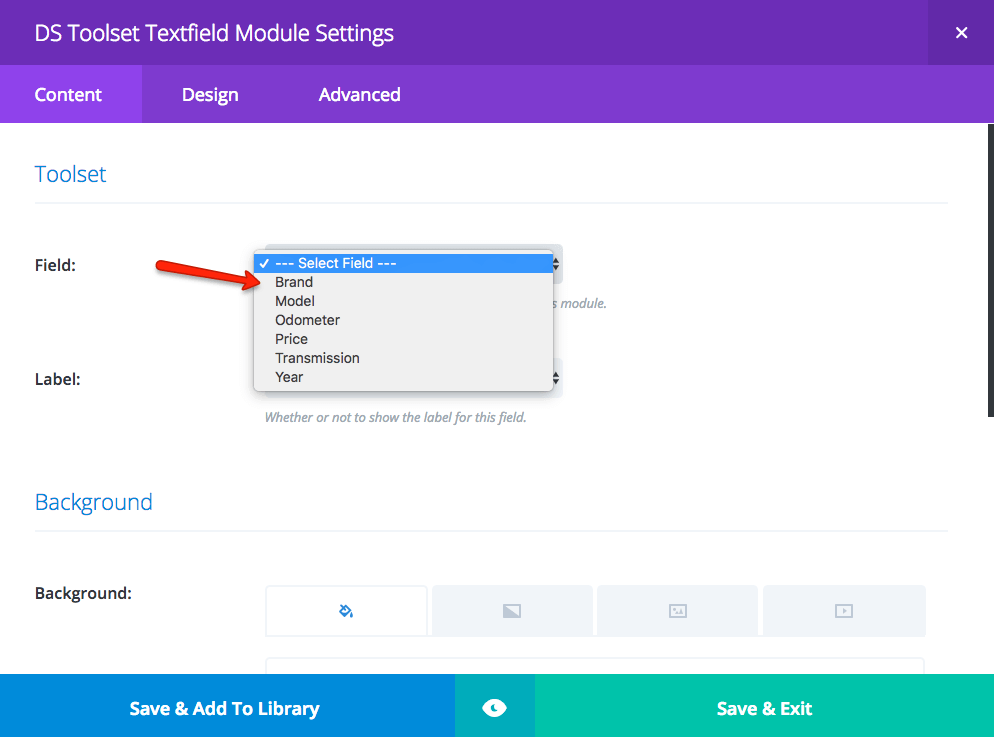
Selecting a custom field using the Toolset for Divi plugin.
Repeat the steps to insert other fields along with your post fields such as the featured image.
The following screenshot illustrates how your input might look:
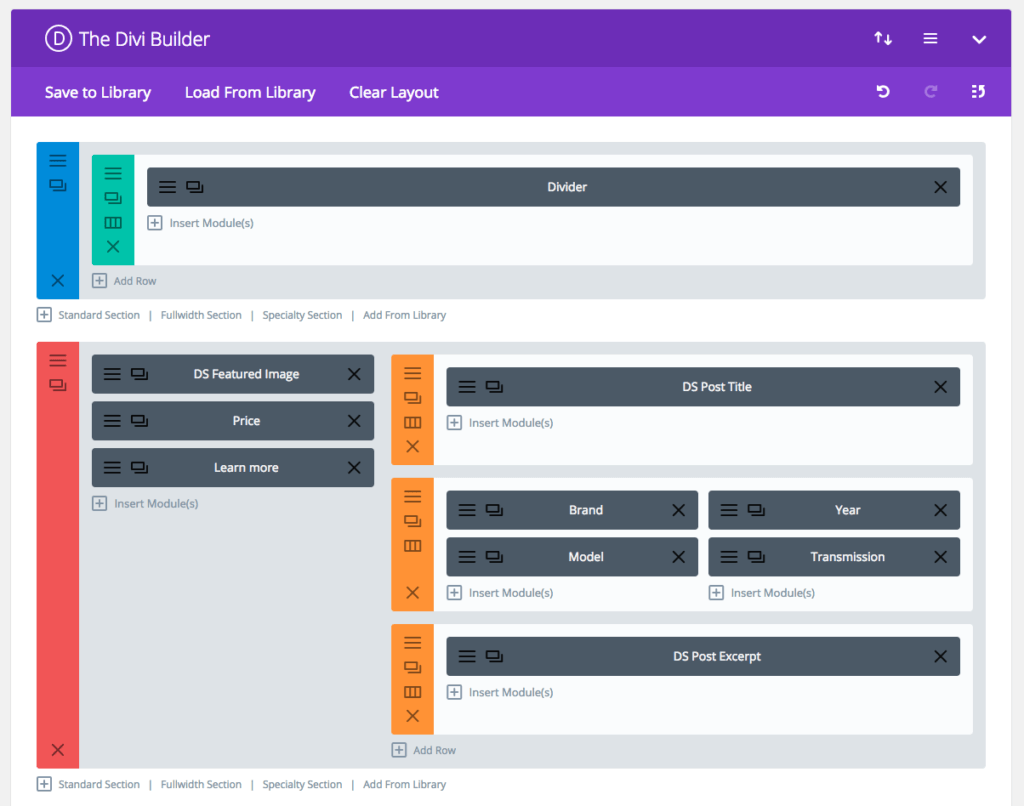
Sample appearance of a single car entry in the WordPress backend
Styling the layout
To style your modules, first pick the desired module and switch to the design tab. Note that you can style your field labels separately from your field values.
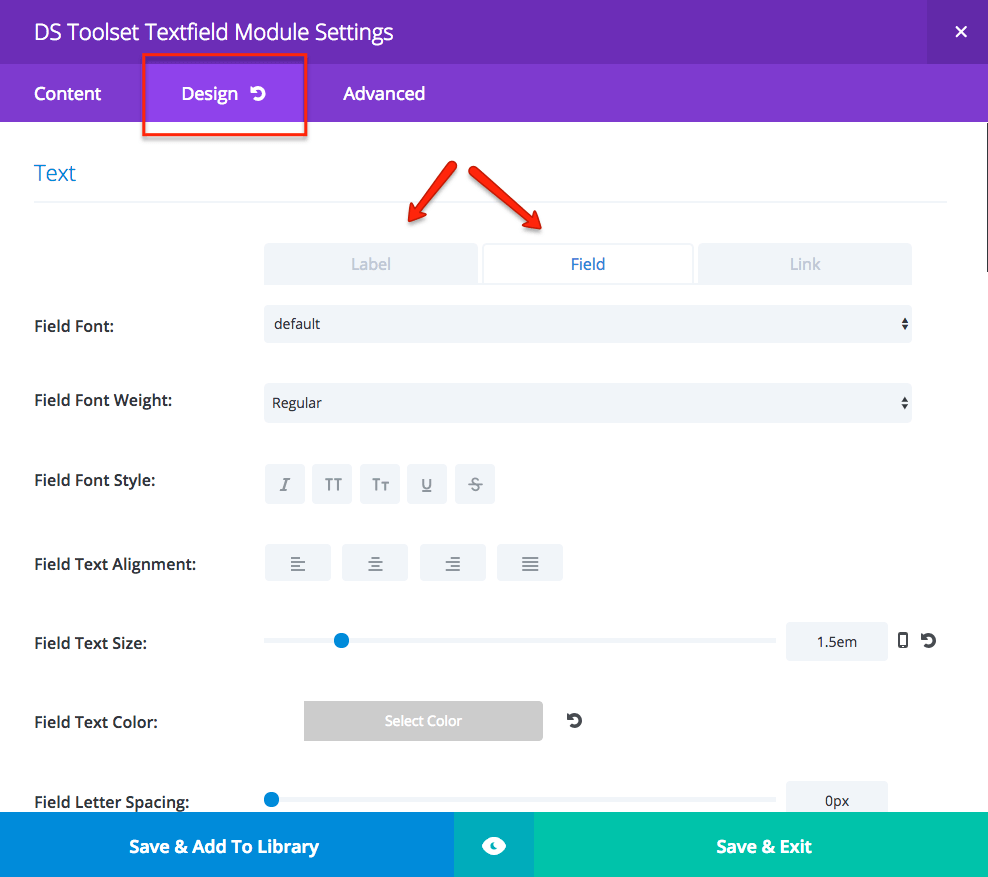
How to style the output using the Toolset for Divi plugin.
In our example, “Brand” is the field label and “Suzuki” is the value of your Brand custom field.
When your output layout is ready, save the changes and return to your View.
Creating a page with the search view
Thus far, we have built a View that lists all cars.
Let us now insert the View onto a page to see how the results are presented on the site front-end.
Having returned to your Search View, locate and click the Create a page with this View button.
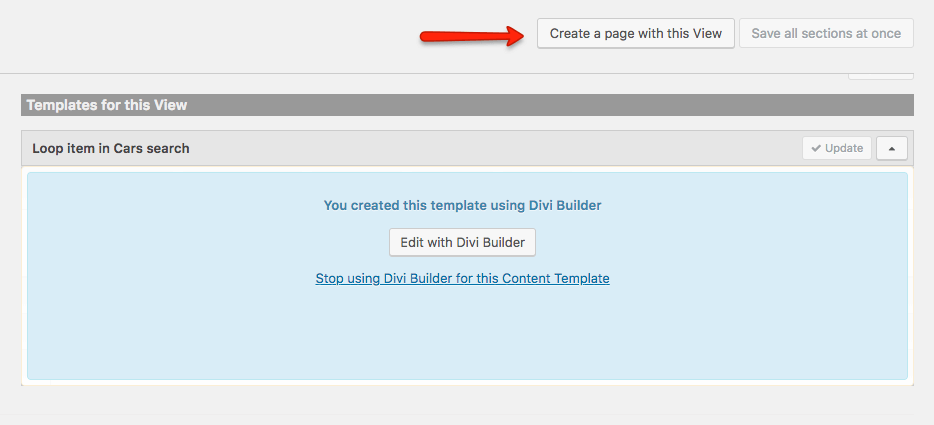
Creating a page that includes the search view.
A new page will be created with your search View included. The View is available as a shortcode and you can insert it into any page.
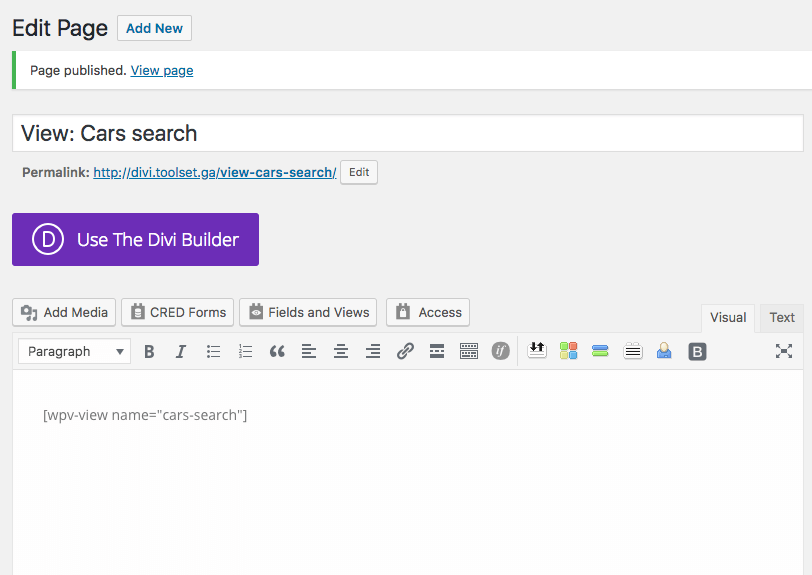
Page with the search view included.
Here are our results thus far:
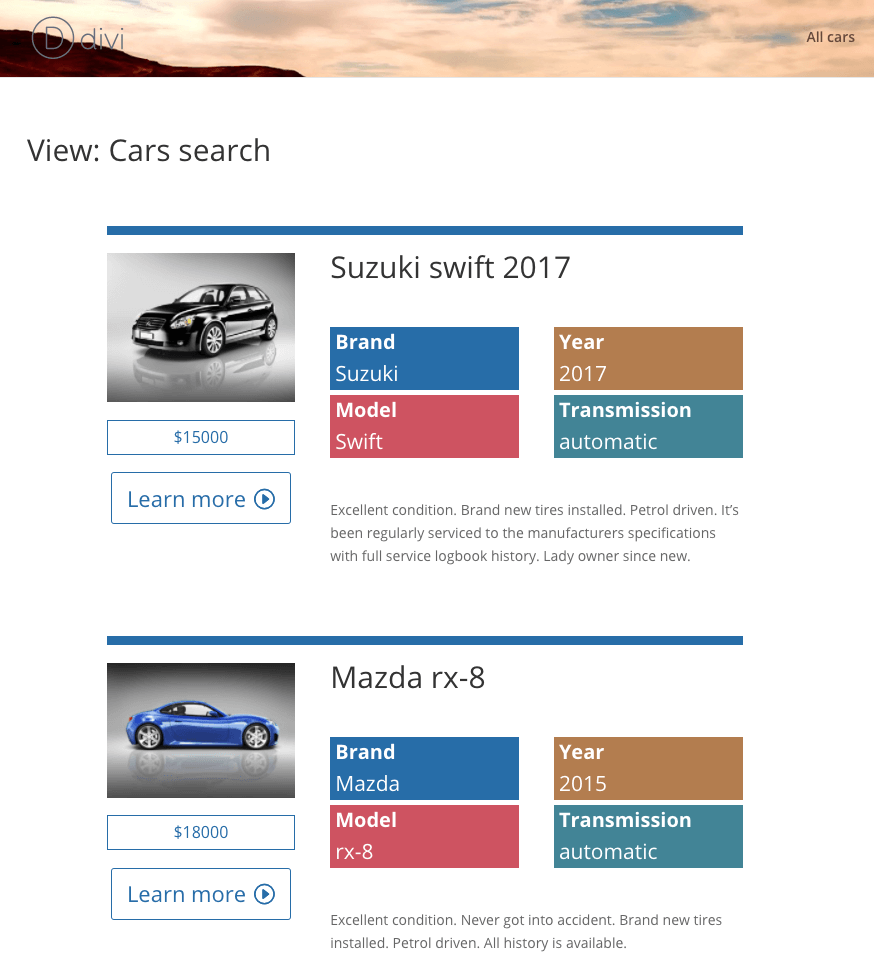
Page with the Search View showing what is thus far visible on the front-end.
Creating the search form
We next need to add the search form with filters and a Submit button. In this step, we want to produce something that appears similar to the following:
Adding filters
You can use all or some of your custom fields as filters. In our example, these will be the car brand, model, year, and price range.
Return to editing your View.
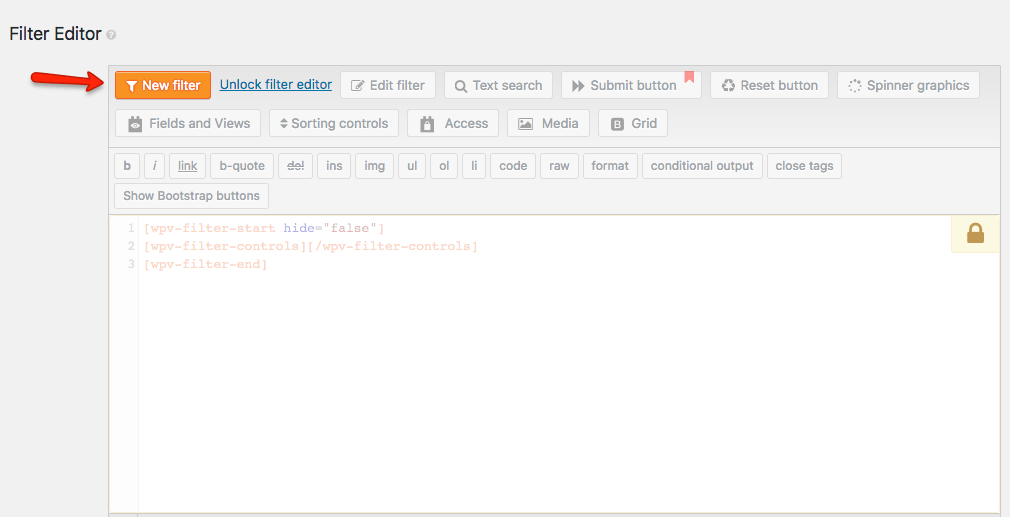
- 1. In your View edit screen, scroll down to the Filter Editor.
- 2. Use the New filter button to add your filters.
- 3. Insert the fields of your choice. In the screenshots that follow, we show how you can set up the Brand field to include a dropdown list and how to use the Price field to include a filter based on price range.
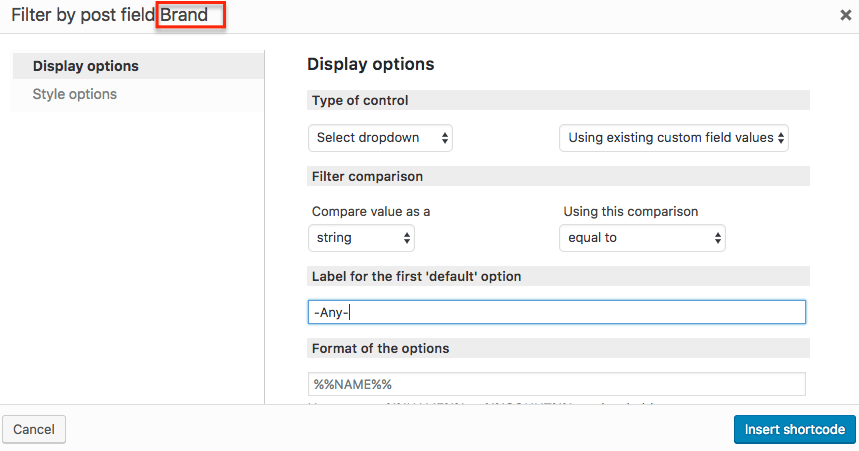
How to add the Brand field as a filter.
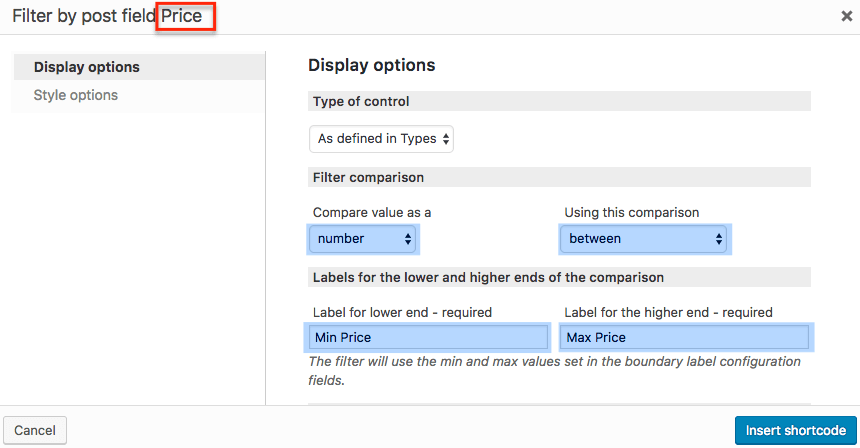
How to set up price range as a filter.
Your input fields are inserted as shortcodes.
Adding the Submit button
Once your filters are in place, add a Submit button so that the user can execute the search.
1. In your Filter Editor, click the Submit button option as shown.

Adding the Submit button.
2. Complete the fields that appear in the dialog that opens.
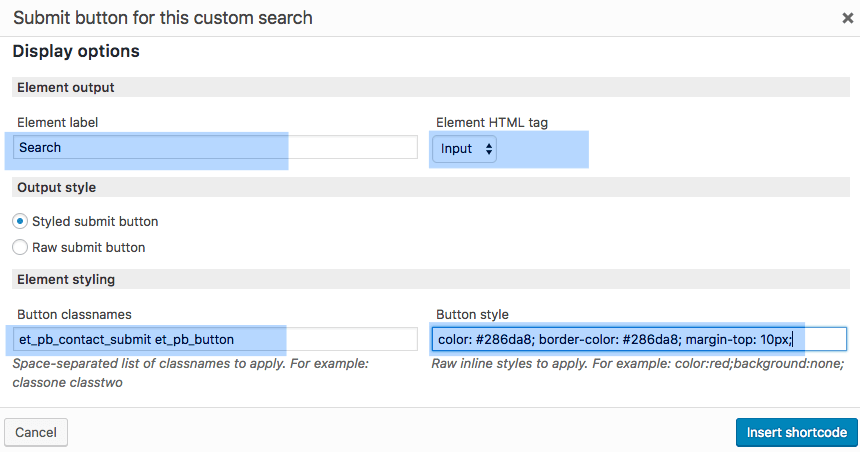
Setting up the options for the Submit button.
Styling the input fields
If you now test your search, it should work fine and the results should be filtered according to the user’s selection criteria.
There is one final step: styling the input fields. Please compare the following screenshots:

Before
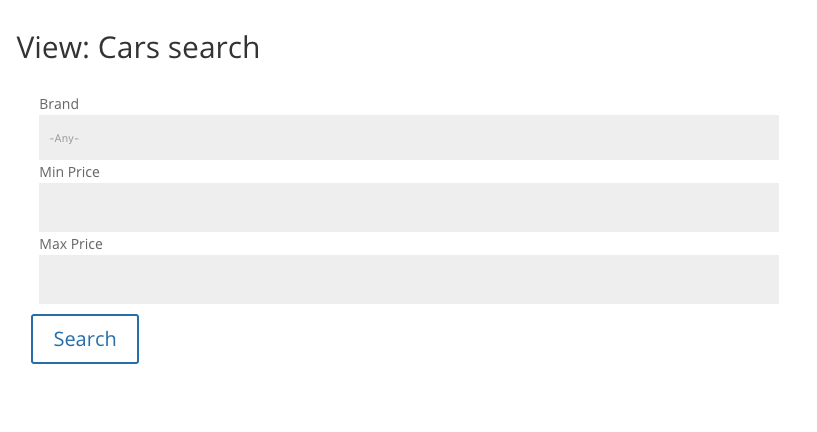
After
To style your filters use the CSS editor:
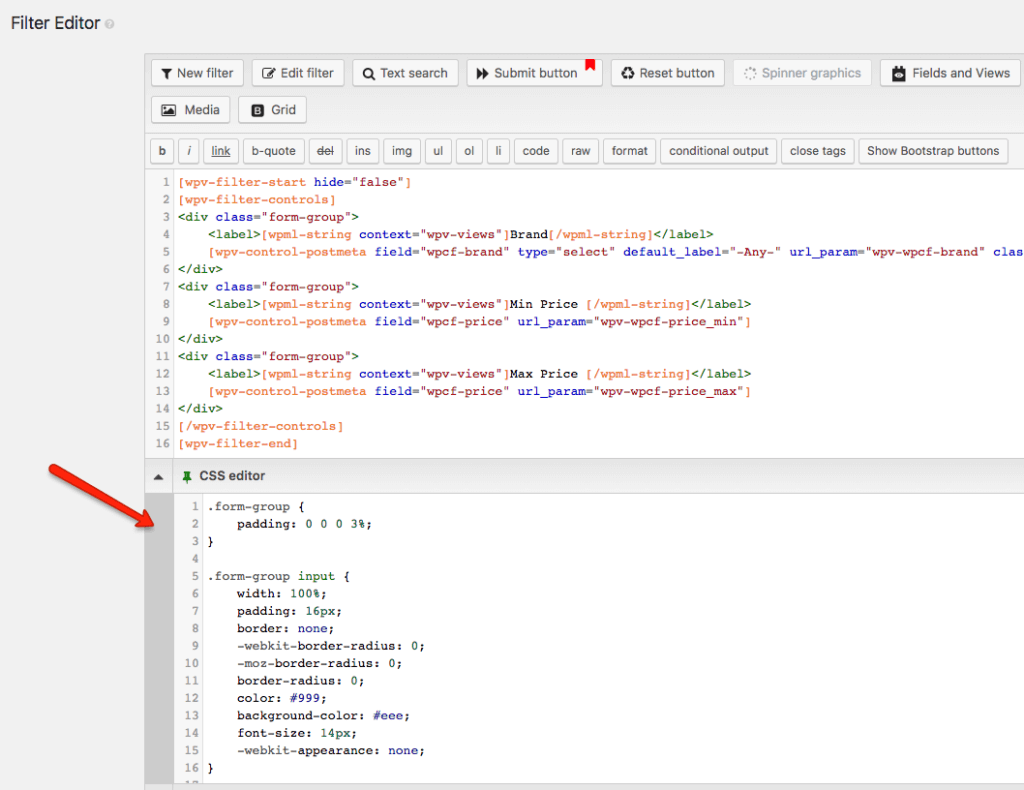
Adding custom CSS to the filters.
Summary
Using Toolset and the Toolset for Divi plugin, you can create a search for any post type using the custom fields of your choice.
In this tutorial we created a search for cars.
To summarize the required steps:
- Add a custom post type with custom fields.
- Create a Search View.
- Design the search results through the Divi interface.
- Insert your search onto a page.
- Design the search form:
- Use custom fields as filters.
- Do not forget to include a Submit button.
- Add some HTML and CSS to style your filters.
If want to learn more about Toolset, visit the toolset.com site.



And that is how a Rocket Ship is built from scratch! >.<