
WS Form Pro is a feature-rich form creation tool for WordPress that makes it easy to build complex forms with no technical knowledge. Use the drag and drop builder, add conditional logic, and view forms for multiple screen sizes. Display the forms with shortcodes and with the built-in Divi module. Expand your forms even further with 26 add-ons. In this article, we’ll look at WS Form Pro, see how easy it is to use, and see what it can do.
Installation and Setup
Install and activate the plugin as normal, and then go to WS Form in the dashboard menu. This will provide the screen to activate your license. You’ll then see the welcome screen that will help you set up WS Form Pro. Click the button and answer the questions to complete the setup.
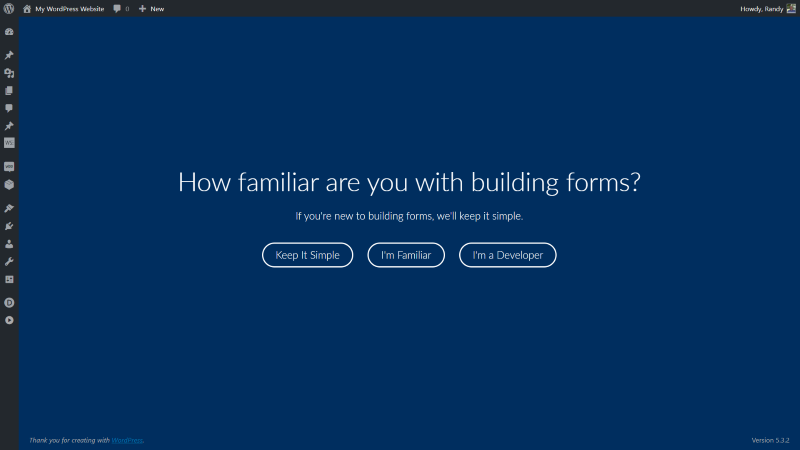
Select how familiar you are with building forms. This will determine how complex your options will be. I chose Developer.
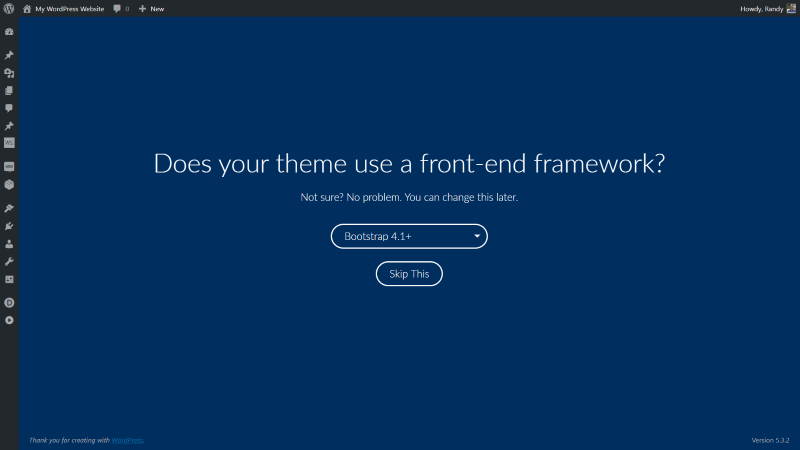
Developer gives you the option to choose your front-end framework. Choose between several versions of Bootstrap, several versions of Foundation, not sure, no framework, or skip this step.
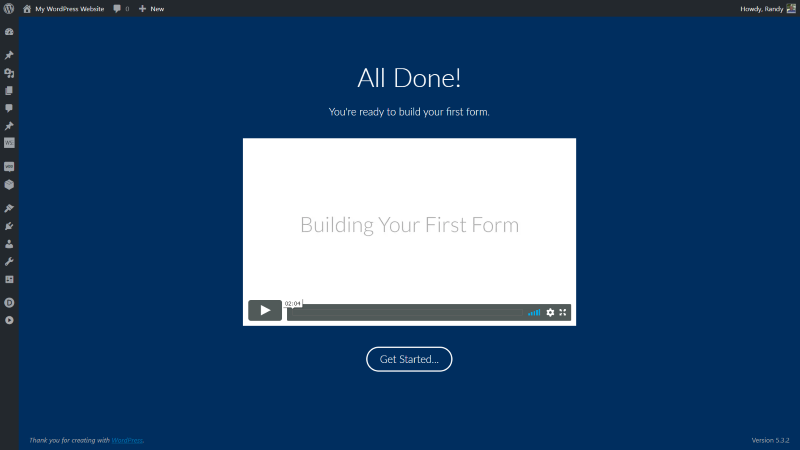
Once you’ve answered all of the questions you’ll see an introduction video to help you get started.
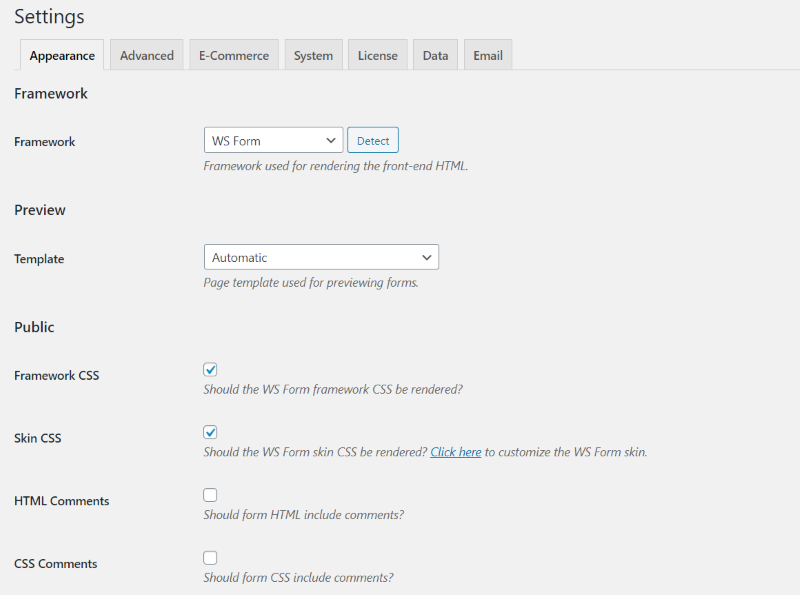
Settings includes tabs for appearance, advanced, e-commerce, system, license, data, and email. First, go to the license tab and add your license key. For this article, I’m leaving everything at their defaults, but this is where you’d set up the framework, currency, logo, size, etc.
Forms
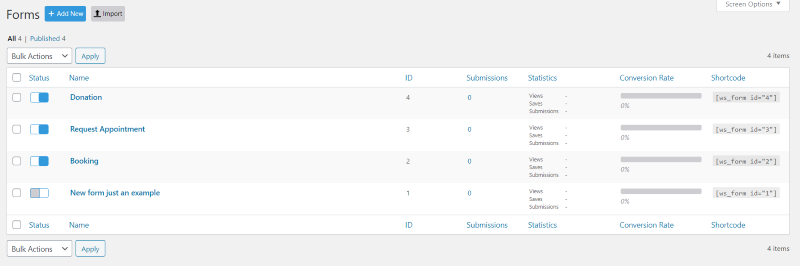
Your forms will appear in the Forms list. You can add a new form or import a form. It will show the status, name, ID, number of submissions, statistics, the conversion rate, and the shortcode that you can copy and paste anywhere you want the form to display.
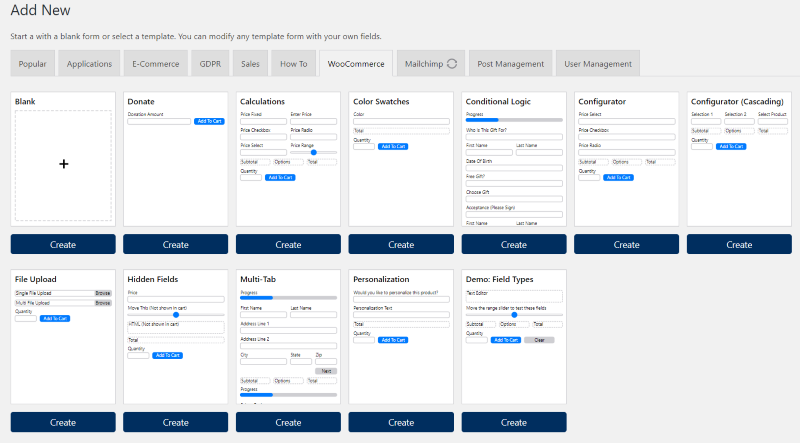
Add New
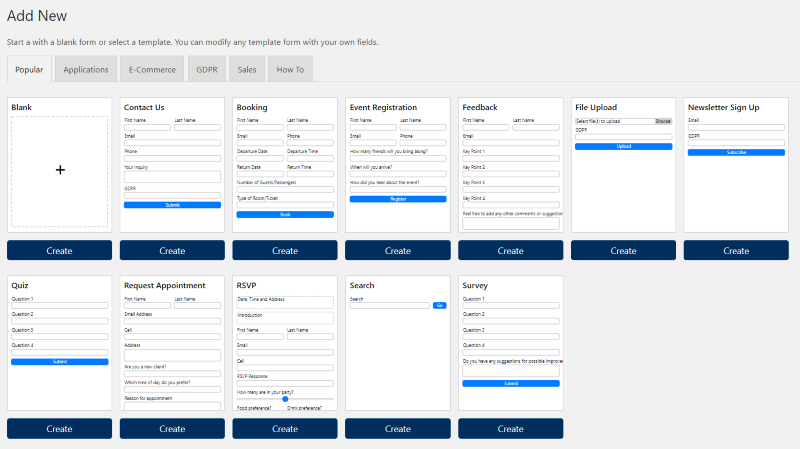
Selecting Add New opens the form creation tools and templates. This includes a list of tabs that lists templates including popular, applications, eCommerce, GDPR, sales, and how to. Select any template as a starting point. You can customize them as much as you want. It shows a thumbnail of each form so you’ll know what it looks like before loading it. To load a form, just click Create.
This example is the popular templates. It includes blank, contact us, booking, event registration, feedback, file upload, newsletter sign up, quiz, request appointment, RSVP, search, and survey.
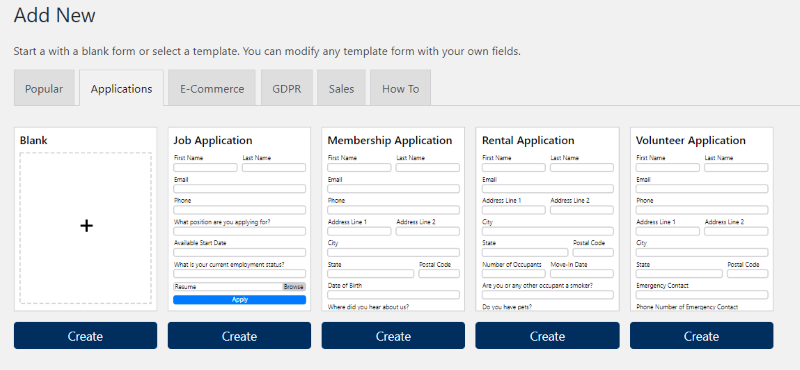
This example shows applications. It includes job, membership, rental, and volunteer.
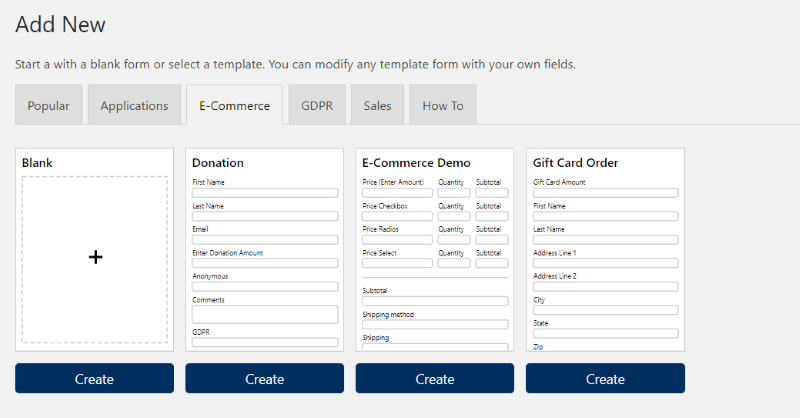
E-Commerce includes donation, e-commerce demo, and gift card order.
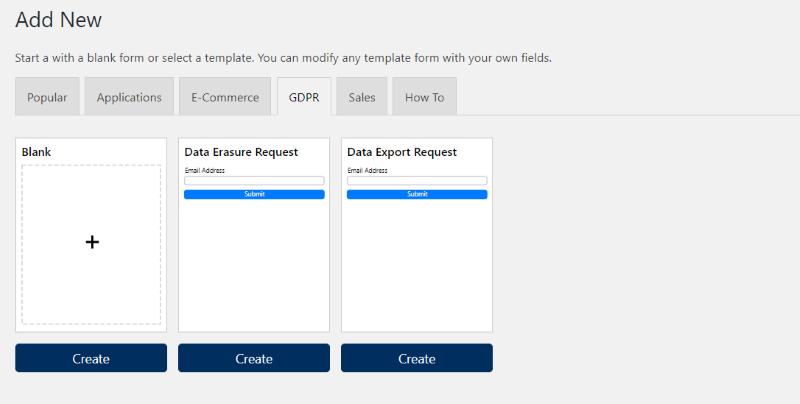
GDPR includes data erasure request and data export request.
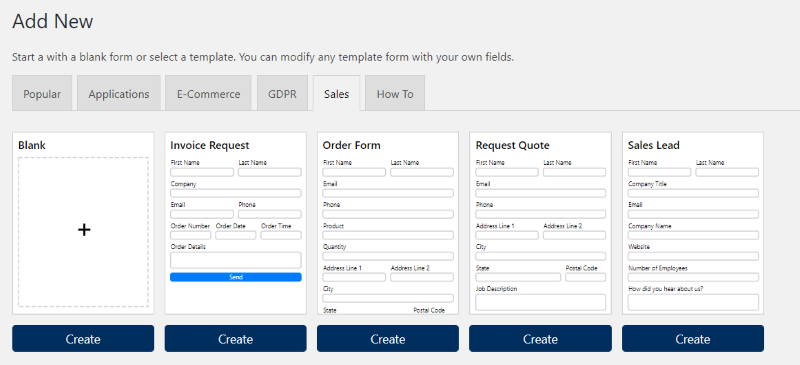
Sales includes invoice request, order form, request quote, and sales lead.
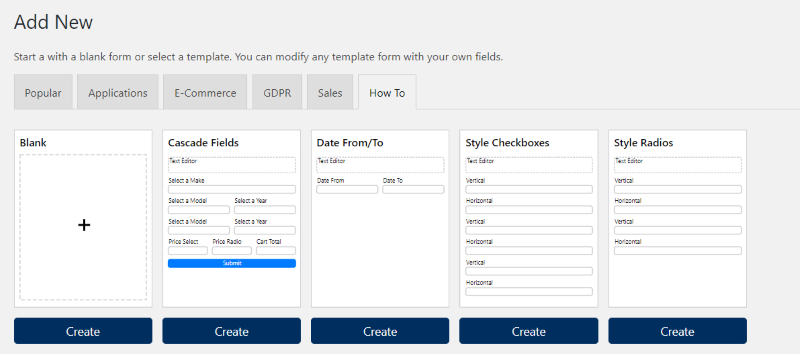
How To includes cascade fields, date from/to, style checkboxes, and style radios.
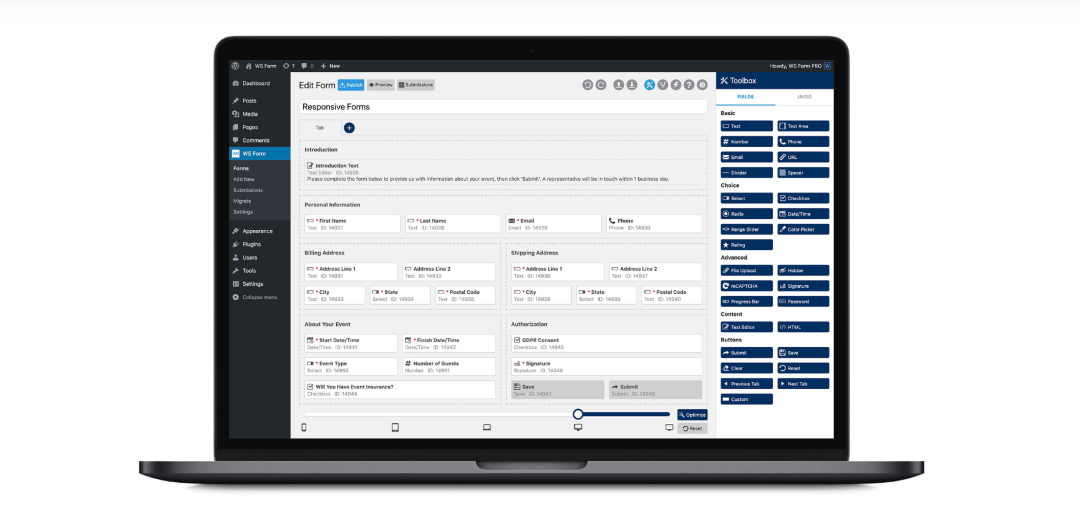
Form Editor
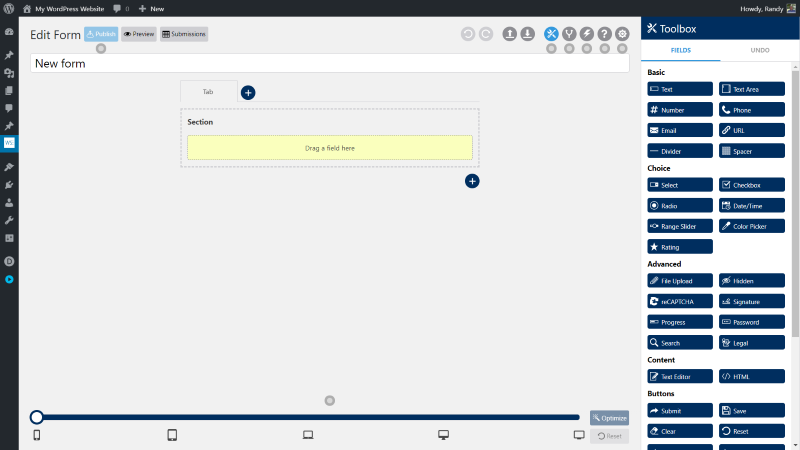
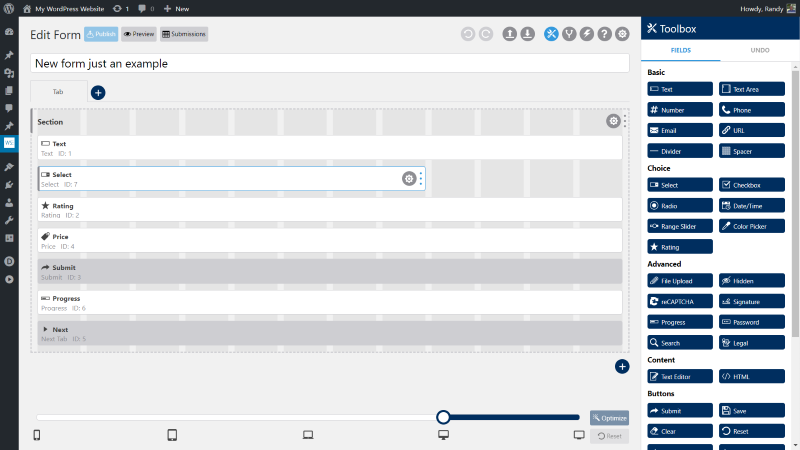
The form editor has a clean design that’s easy to use. The form itself is created in the center of the screen. This area includes buttons to add tabs and sections, and an area to drop fields into. Hovering over any of the buttons shows a tooltip that describes what it does.
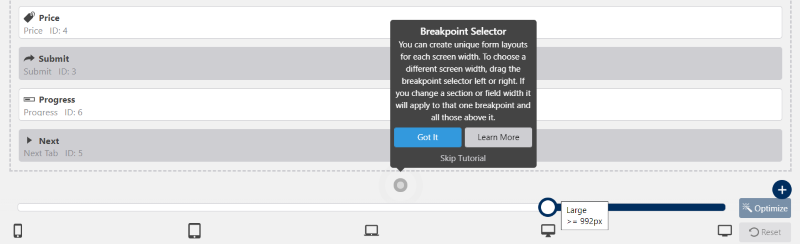
The bottom of the screen has a slider bar with icons of different types of devices. This shows the form for different screen sizes. Clicking on one resizes the form in your editor. This makes it easy to build the form for specific screen sizes and test it on all of them at the same time. An animated circle alerts you to a tutorial about the breakpoint selector. The optimize button tidies up your field sizes behind the scenes to make the outputted CSS faster and more efficient.

Across the top of the editor are the buttons on the left and right. The left has buttons to publish the form, preview the form in a new tab on the frontend, and view the submissions for the form. The right has undo, redo, import, export, toolbox, conditional logic, actions, support, and settings. Many of them have animated circles to draw your attention to tutorials.
Toolbox
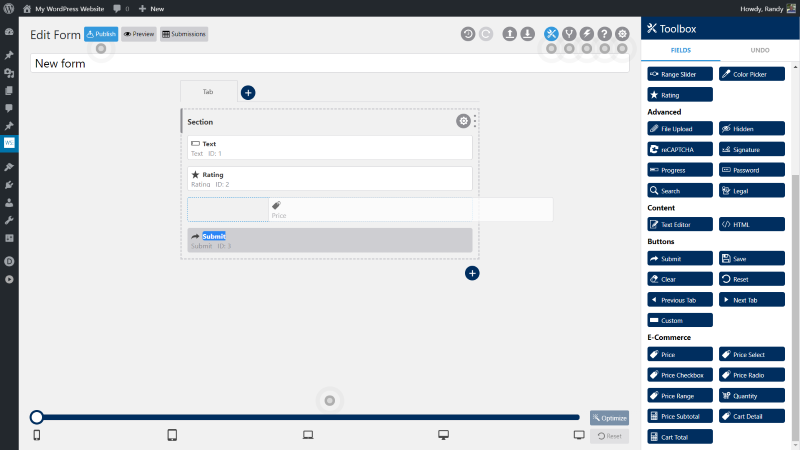
All of the fields you need to create your forms are in the toolbox on the right. It’s divided into sections to make them easier to find. The sections include basic, choice, advanced, content, buttons, and e-commerce. Just drag and drop the fields anywhere you want them in the section.
Conditional Logic
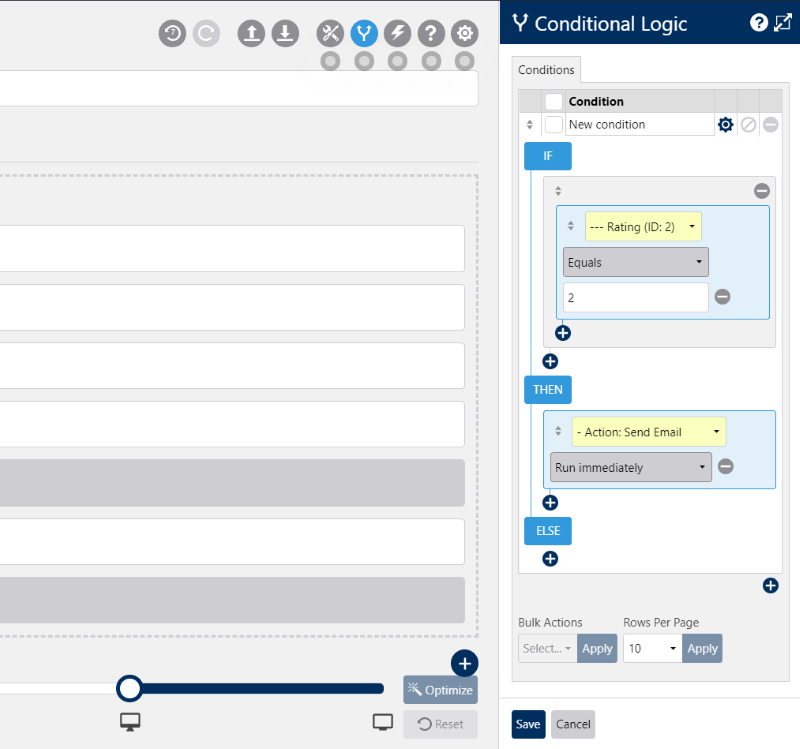
The conditional logic is built with IF, THEN, ELSE statements. All you have to do is select what you want for each one in the dropdown boxes.
Actions

The Actions tab allows you to choose existing actions and create your own. You can edit, disable, and delete them. Clicking Add Row creates a new action and provides a dropdown box with options. You can easily track conversions, erase data, export data, create a custom endpoint, redirect to a URL, run JavaScript that you enter into the script editor, run a WordPress hook or search, send an email, and show a message.
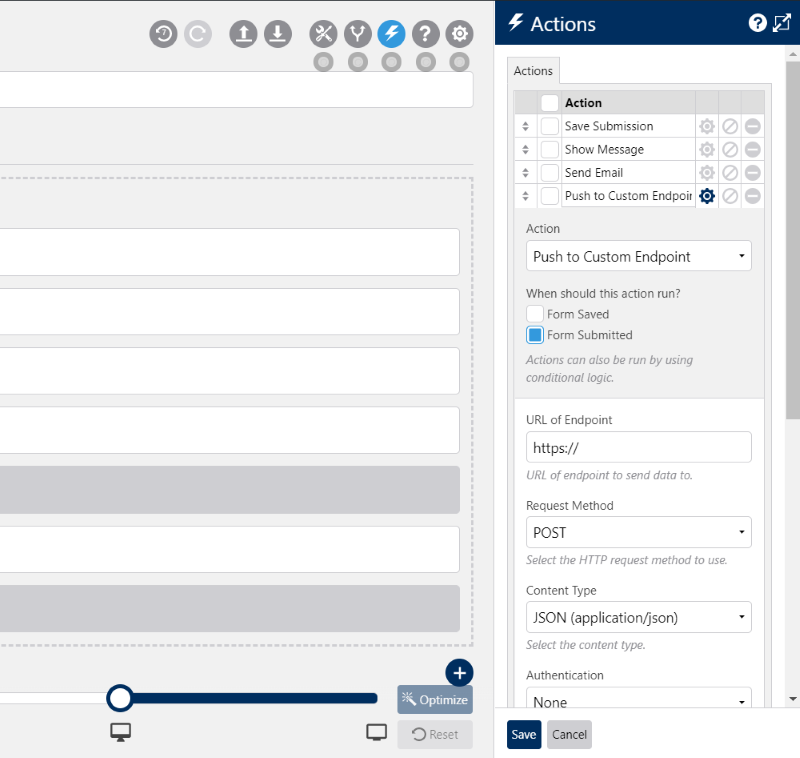
Selecting one opens a list of options for that action.
Settings
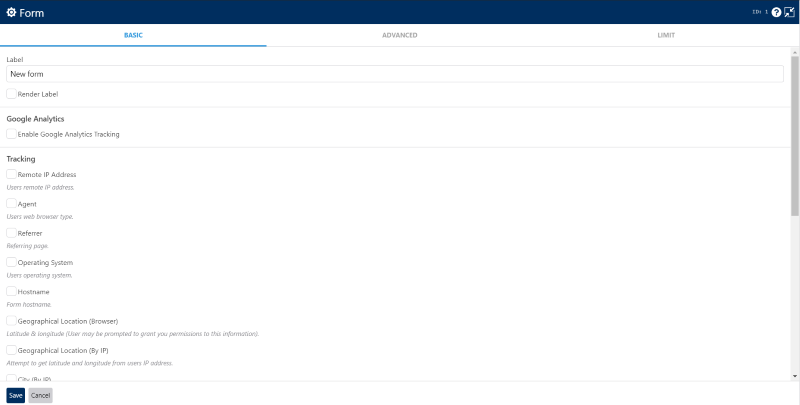
The Settings tab includes basic, advanced, and limit options. I’ve expanded it to show full-screen. The basic settings let you enable Google Analytics, setup tracking, enable honeypot for spam protection and set the spam threshold.
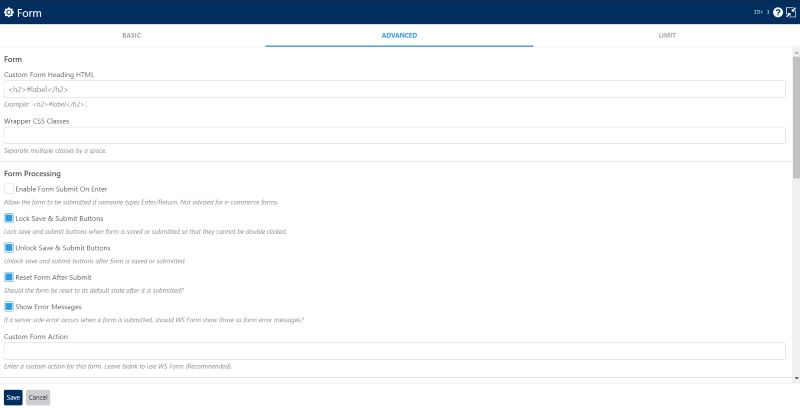
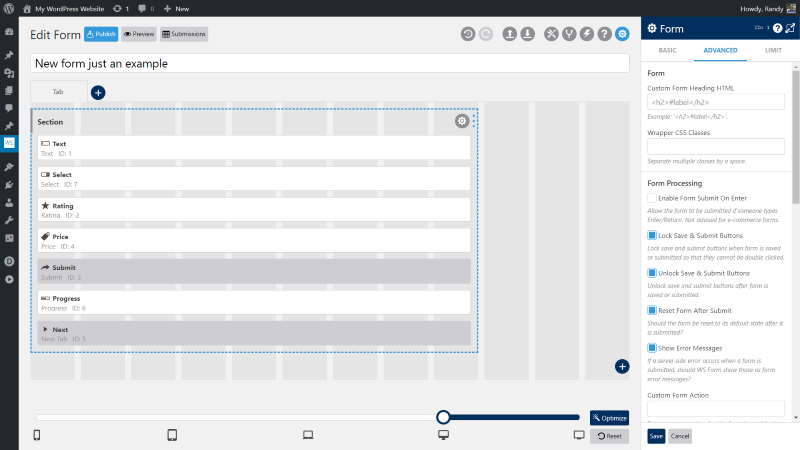
Advanced includes custom for heading HTML and CSS, form processing, and HTML and CSS options for tabs, sections, and fields.
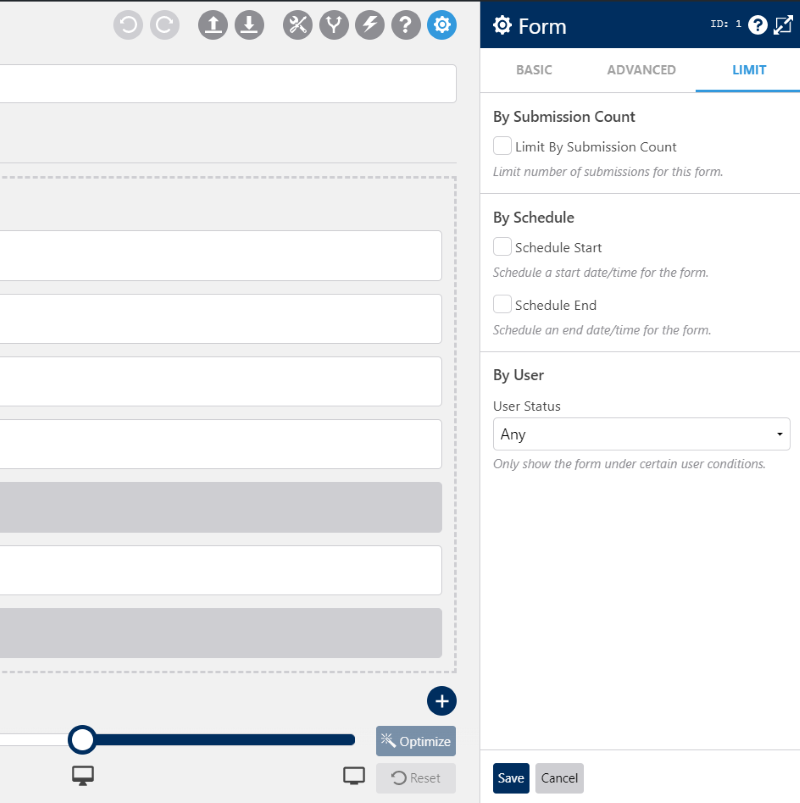
The Limit tab allows you to set the submission count, schedule the start and end date when the form will be available, and show the form to either logged in or logged out users.
Sections
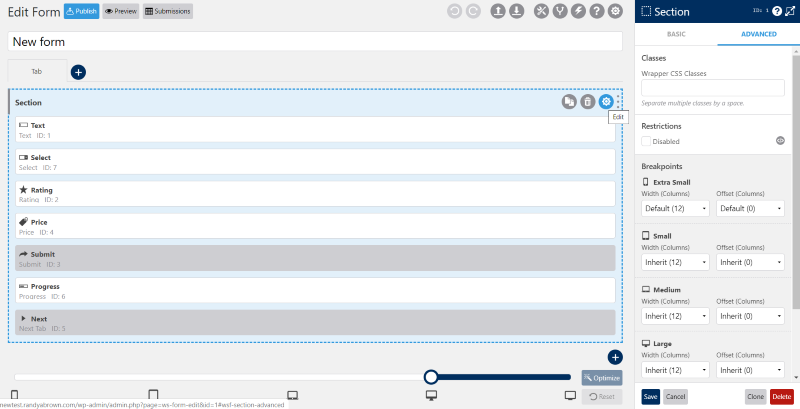
Clicking the gear for the section opens its settings. It has two tabs. Basic settings allow you to change the label and show or hide it. Advanced settings include a CSS wrapper class field, restrictions, and breakpoints for each of the screen sizes.
Change the column size of the form by grabbing the edge and dragging it to the size you want. It shows columns in the background to help you with the sizing.
Fields
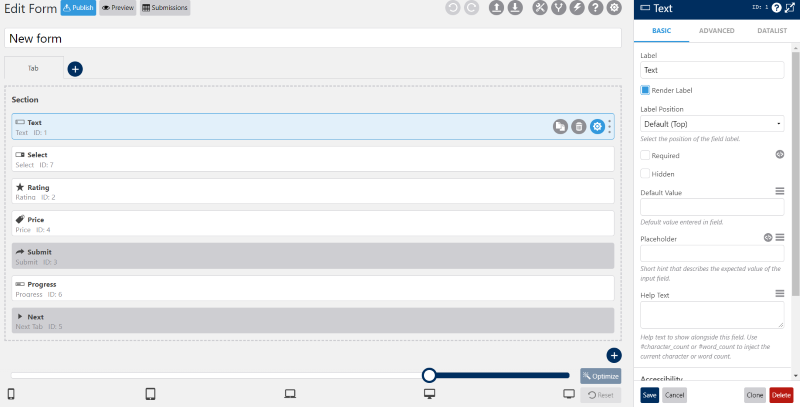
Each of the fields includes their own settings. Each field is different, but most include basic and advanced settings. Several include a third tab with options. They allow you to choose data types, enter placeholder text, set a field as required, change labels and values, add CSS classes, and lots more.
The fields are full-width by default, but it’s extremely easy to change their size. Just grab the edge of the field and drag it to the size you want. A grid appears to show the size options.
WS Form Examples
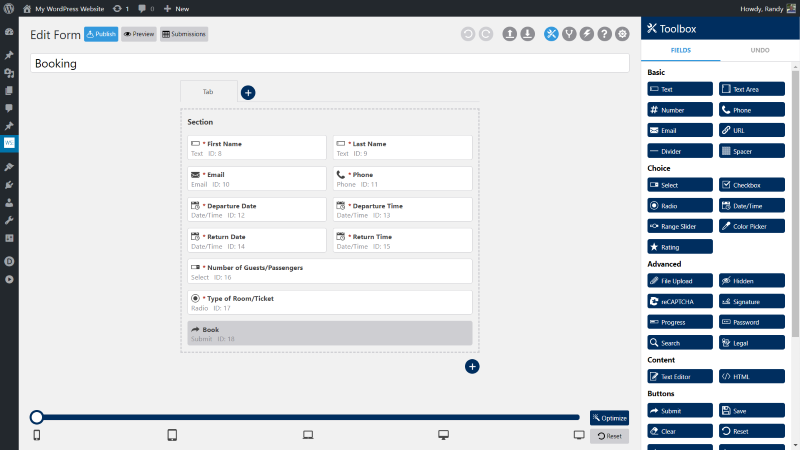
This is the Booking template. It displays fields in multiple columns. The default view shows how it looks on mobile.
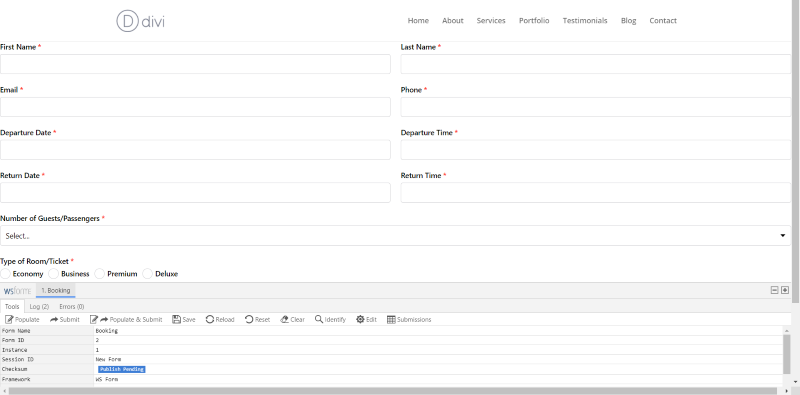
The preview shows it in full-screen. It adds a set of tools to the bottom of the screen where you can perform several tasks, see the log, and check any errors. This shows for all logged-in users by default. It’s easy to minimize, but it seems to always show on the screen.
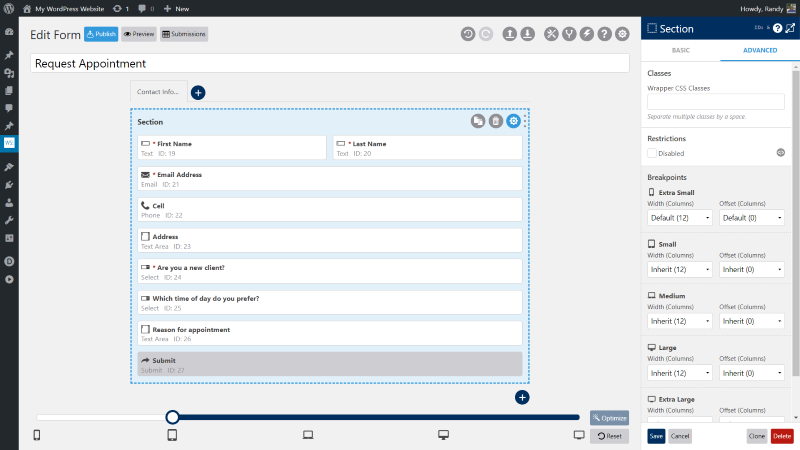
Here’s the Request Appointment template. I’ve selected the tablet view.
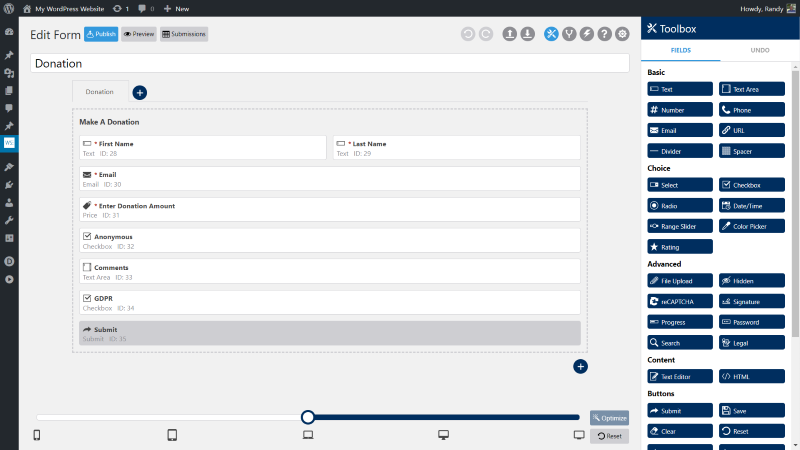
Here’s the Donation form in the desktop view.
Adding Forms to Pages and Posts
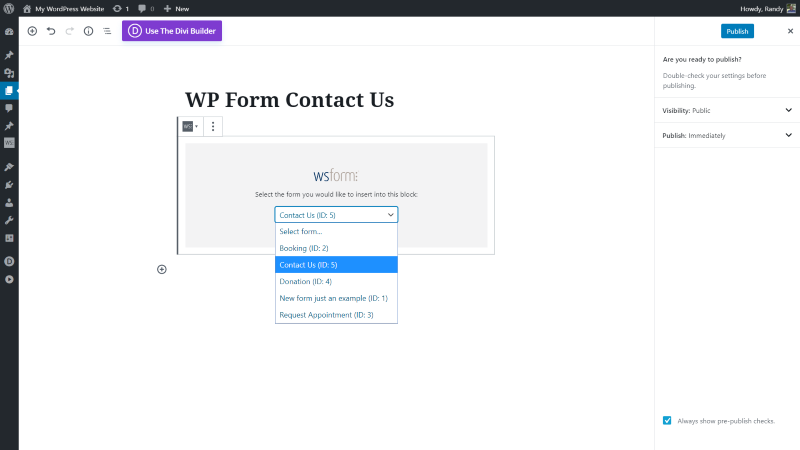
Here’s a look at adding the form to Gutenberg. It adds a WP Form block that you can place anywhere. The block itself has a dropdown box where you can choose your form. To add the form to a page, post, or widget, just paste in the shortcode where you want it.
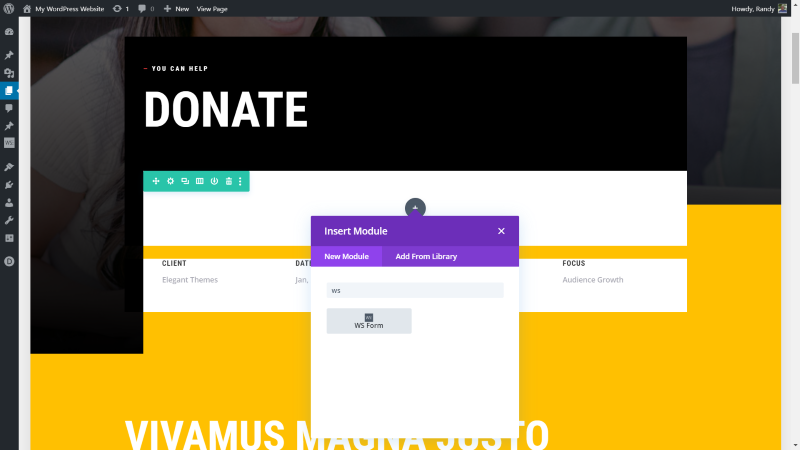
Another option is to use the Divi module.
Styling Forms
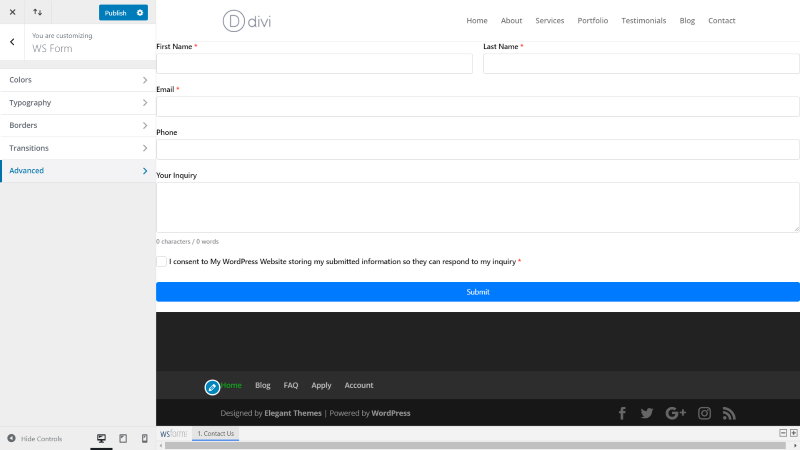
The forms are styled with the customizer on the frontend of WordPress. It includes options for colors, typography, borders, transitions, and the grid gutter (advanced tab).
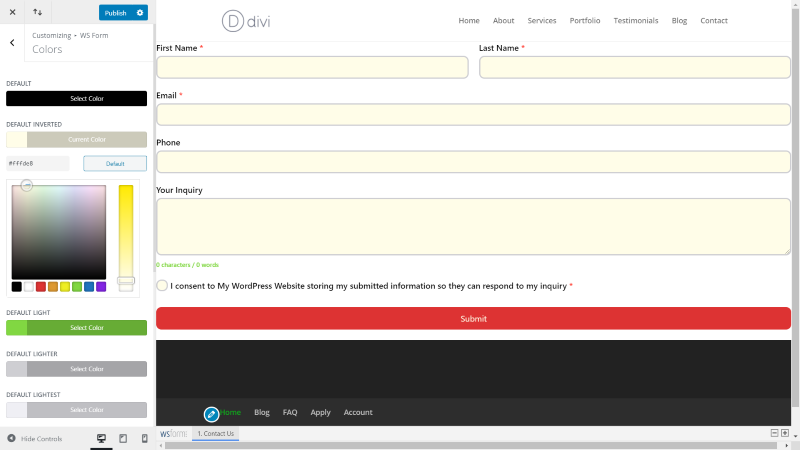
You see the adjustments in real-time. Since the adjustments are made in the customizer, they’re global. This means that any adjustments you make here affect all of your forms. You can style them with CSS if you prefer to style them individually.

The other option is to style each page or post with the Divi module. You can create global settings or style them individually. In this example, I’ve added a background image with an overlay to sit behind the form fields, added a box shadow, and a green border. I’ve also customized the module text font style and added a green double underline to match the border.
Submissions
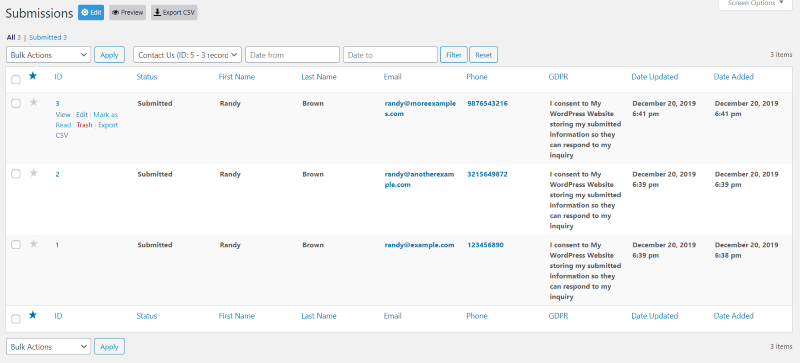
Submissions shows the results for each form. Select the form from the dropdown box that you want to see the submissions for. You can then view, edit, mark as read, delete, preview, export, view by date range, etc. It lists the results for each of the fields. The phone number and email are clickable.
Addons
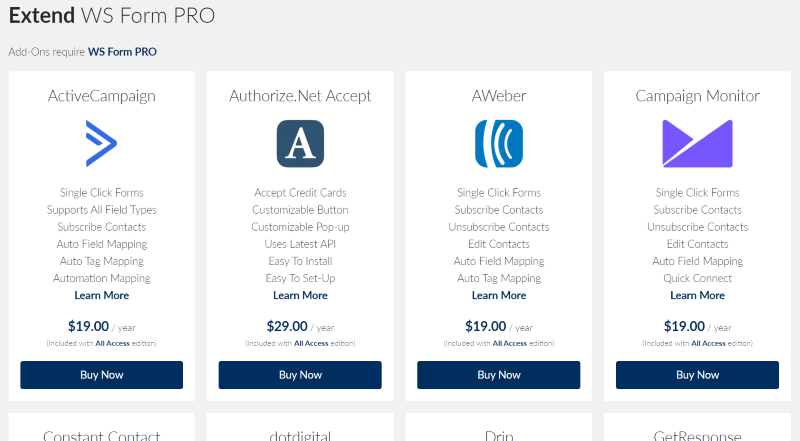
WP Form Pro has 26 add-ons that can extend the features of your WP Form plugin. Prices range from $9-$49 per year. Each add-on is an individual plugin that you can upload and activate if you have WP Form activated. You’ll need a license key for each add-on.
Add-ons include:
- ActiveCampaign
- Authorize.NET Accept
- AWeber
- Campaign Monitor
- Constant Contact
- dotdigital
- Drip
- GetResponse
- Google Sheets
- HubSpot
- iContact
- Klaviyo
- Mailchimp
- MailPoet
- PayPal Checkout
- Pipedrive
- Post Management
- Salesforce
- Slack
- Stripe Elements
- User Management
- WooCommerce
- Zapier
- Zendesk
- Zoho
Most of the add-ons add a new tab to the form creation area where you can select templates. Let’s look at a few of the add-ons.
Google Sheets
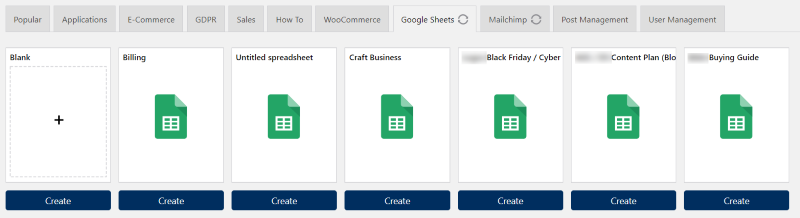
Google Sheets connects to your Google Sheets account and then brings in all of your sheets, allowing you to create a form using the headings for the fields.
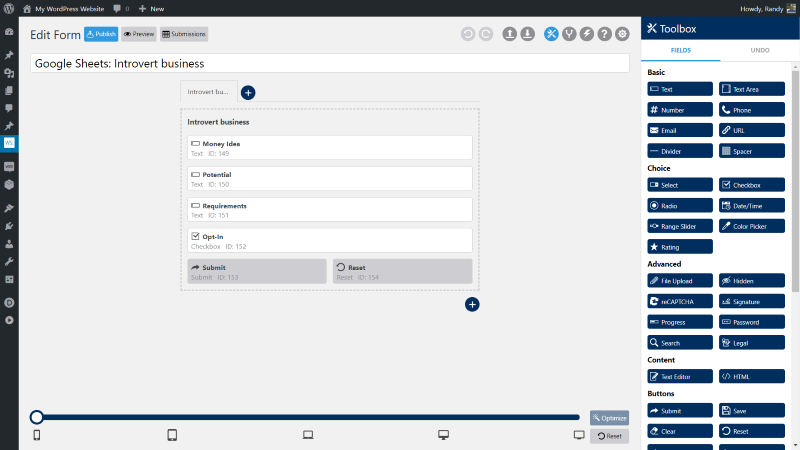
This one is the summary page for the budget template. This one is from a list of business ideas I was working on.
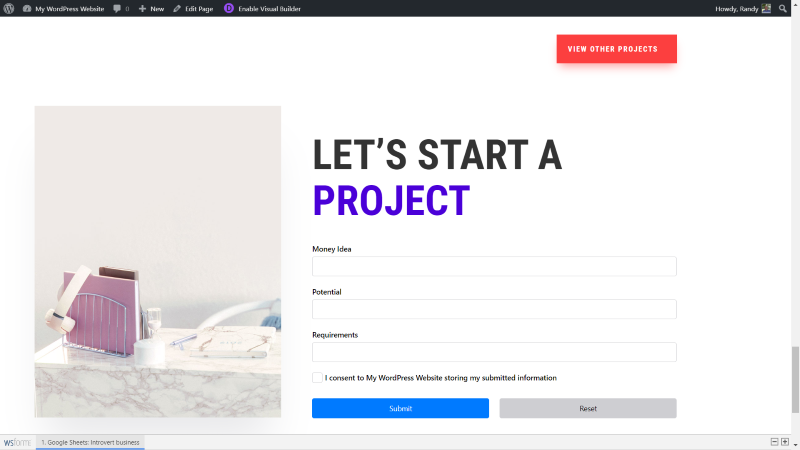
Here’s how it looks within a Divi layout.
Mailchimp
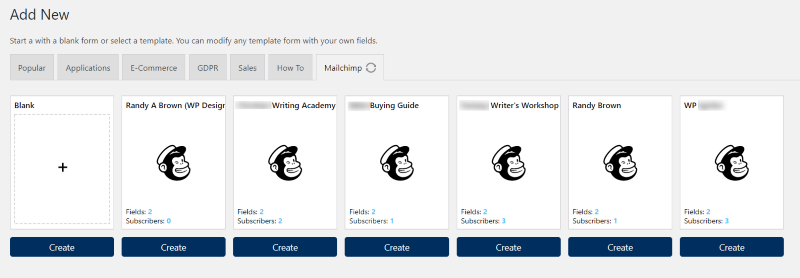
The Mailchimp tab shows all of your email lists. Select the one you want to use.

A contact form is created that’s already connected to your email list.
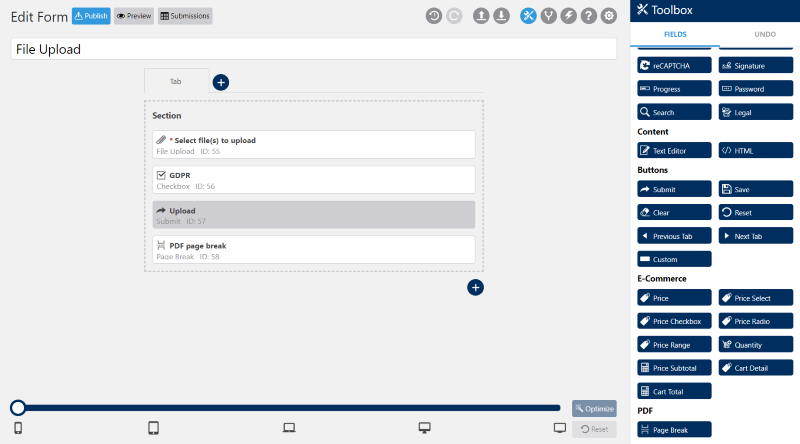
PDF adds submissions to PDFs, lets you export PDFs, attach PDFs to emails, embed images, create PDF page breaks, and create your own PDF designs. In the example above, I’ve added a PDF page break to the upload form.
Post Management
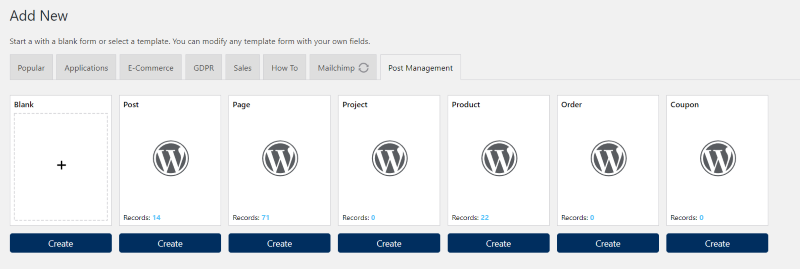
Post Management makes it easy to create forms for specific post types. The Post Management tab shows all of your post types that you can create forms for.
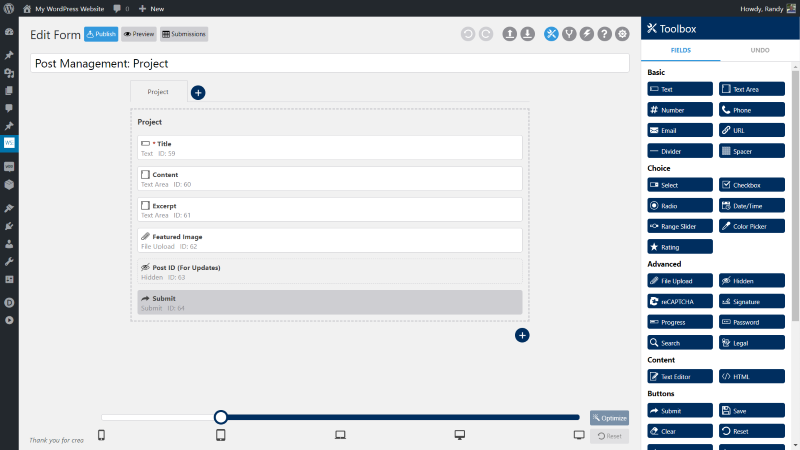
This is the form for the Project post type. It adds fields for the project title, content, excerpt, featured image, post ID, and a submit button.
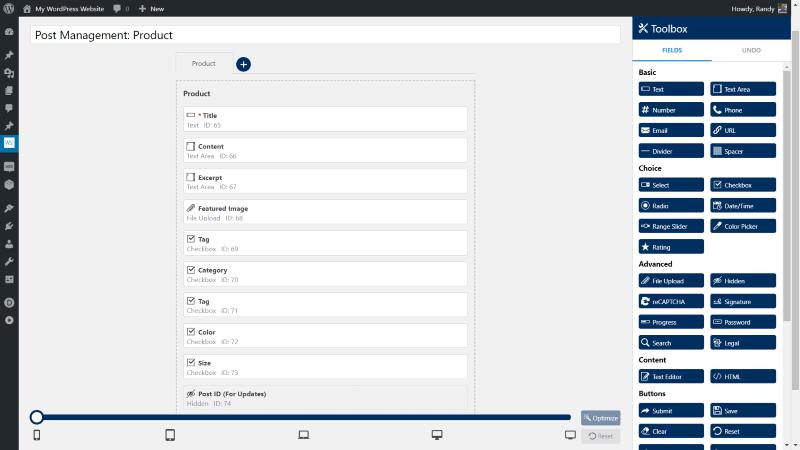
Here’s the WooCommerce Product post type form. It adds fields for tags, categories, color, size, etc.
Slack
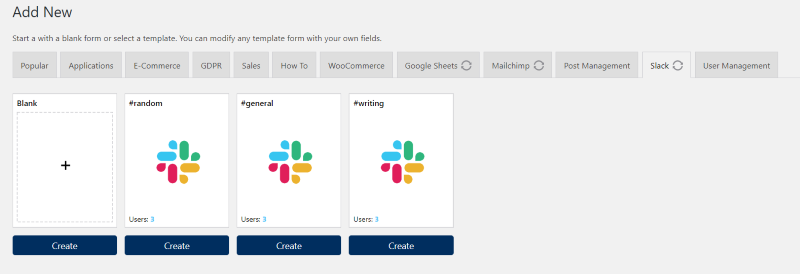
Slack connects to your Slack account and brings in your channels to create forms.
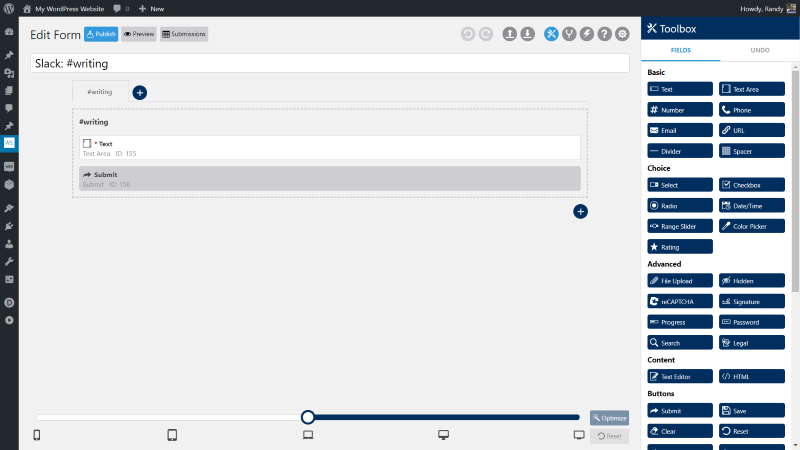
It creates a simple form that can push messages to Slack.
User Management
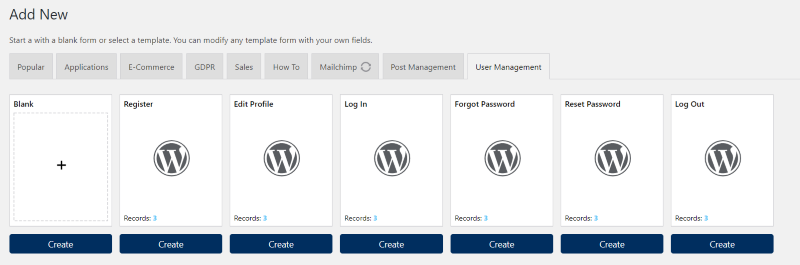
User Management adds forms for user registration, edit profiles, login, password reminder, password reset, and log out.
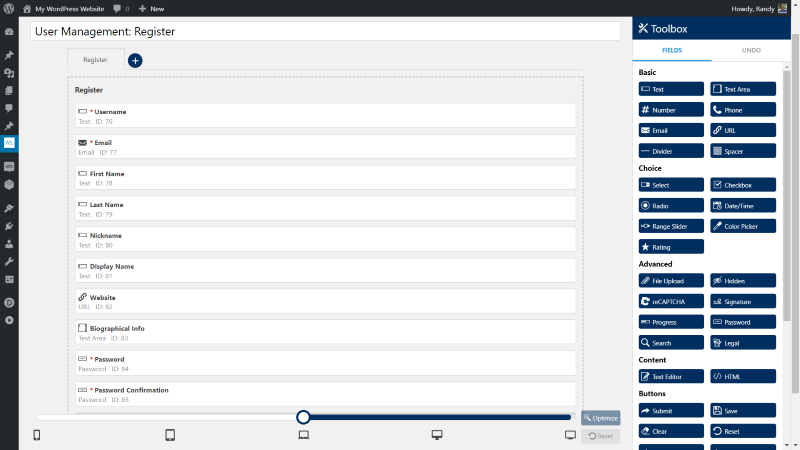
This is the Register form. Users can add their nickname, display name, website, bio, etc.
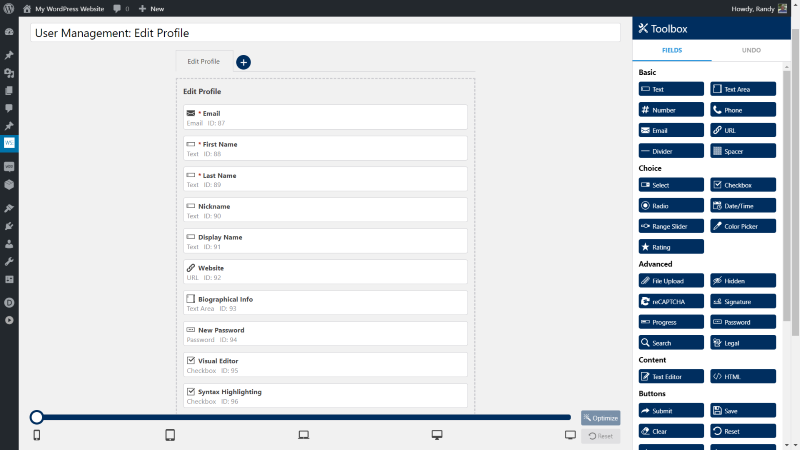
This is the Edit Profile form. It adds a visual editor, syntax highlighting, keyboard shortcuts, toolbar, admin color scheme, and lots more.
WooCommerce
The WooCommerce add-on adds lots of new forms including donate, calculations, color swatches, conditional logic, configurator, cascading configurator, file upload, hidden fields, multi-tab, personalization, and a demo for field types.
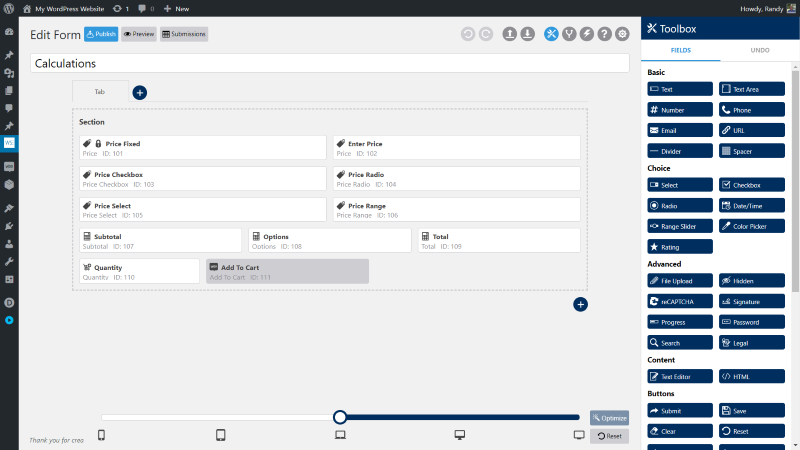
This is the Calculations form. It includes several pricing fields, subtotal, options, quantity, etc.
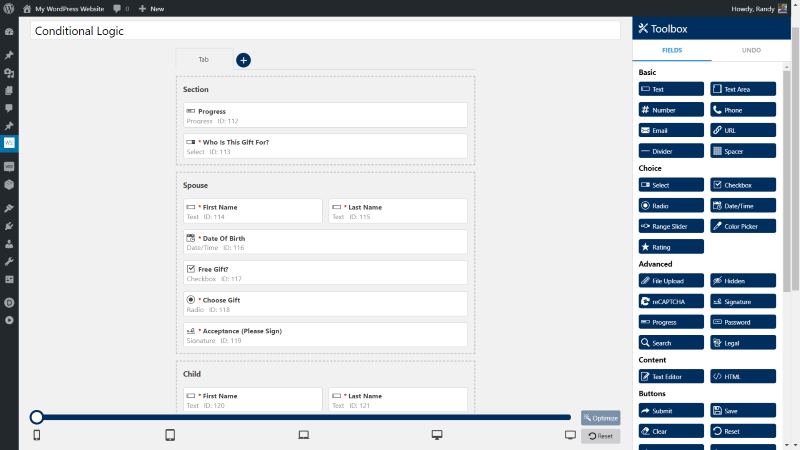
Conditional Logic includes sections for spouse, child, and friend. Only one will show based on the choice that’s selected in the field asking who the gift is for.
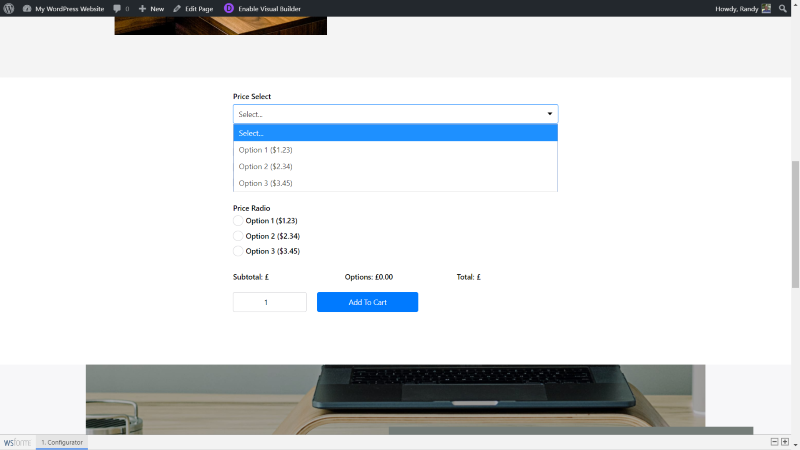
Configurator adds price selection in a drop-down box, checkbox, and radio buttons.
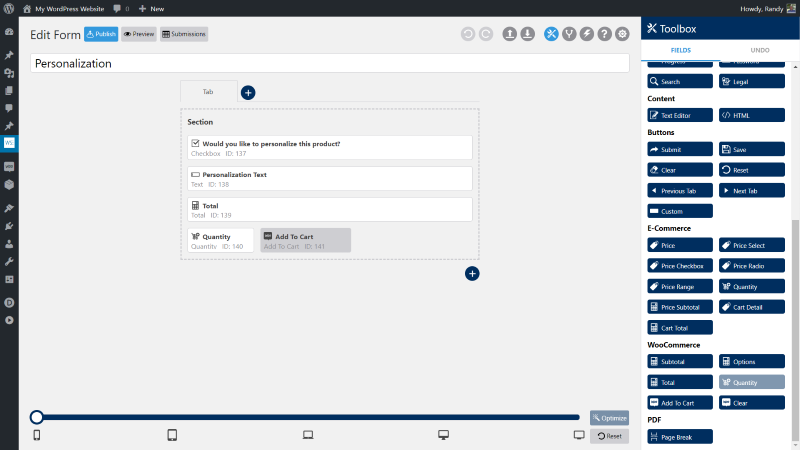
Personalization allows the customer to add personalized text.
The offer
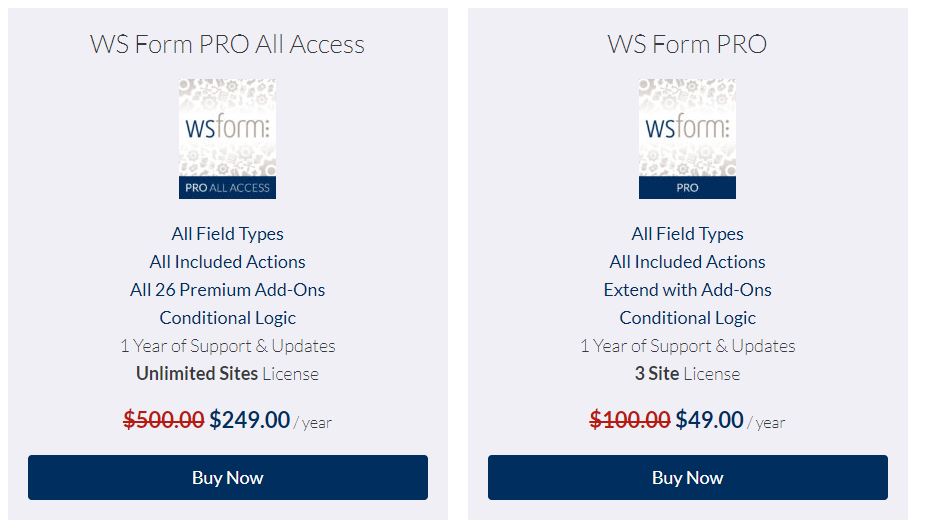
You can purchase WS Form Pro from wsform.com. There are two options to buy and these are a special limited time offer just for Elegant Marketplace users. Use ELEGANT at the checkout or follow the links above and the discount will be applied automatically.
- Buy WS Form PRO All Access and get an extra 20% off
- Buy WS Form PRO and get 3 site licenses instead of 1
- Buy any WS Form PRO add on and get 20% off
Ending Thoughts
WS Form Pro is easy to use. I was able to build any type of form I wanted and edit them with no trouble. It comes with a lot of templates to get you started. I like that we can style them globally with the customizer and with the Divi module. I also like that you can add them with shortcodes to embed them in PHP, add them to widgets, and your WordPress content.
It has enough add-ons for just about any need. Connecting the add-ons is simple and most of them couldn’t be easier to connect to the services. If you’re a developer you can extend it even further with HTML, the browser debug console, and its integrated support for frameworks like Bootstrap or Foundation.
If you’re looking for a powerful form creation tool for WordPress that’s easy to use but highly expandable, WS Form Pro is easy to recommend.
We want to hear from you. Have you tried WS Form Pro? Let us know what you think about it in the comments.
If you are looking for an alternative solution to WS Form Pro, check out this list of Top Free WordPress Form Plugins.


Does this compare well to GravityForms?
Frankly, it knocks it out of the park 🙂
the problem with form plugins is that they are stupid expensive for what they are.
At $49 per year for 3 sites, this one is certainly more reasonable than other plugins at that price. But you are then going to have to renew at the regular $100 price after that.
I went on a mission last year to try and find a form plugin that was cheap but had a lot of good features, and I found eForm. It only costs $39 (no recurring fee unless you want support after the first 6 months).
It has a bucket load of features for that price, much more than any other plugin.
Every other plugin I have tried, you need to spend even more money on addons to get what this plugin provides as standard.
I hear you. However, this plugin has so much more in the pro version. Accessibility, totally responsive editing views, drag and drop, phenomenal logic intent, eCommerce connections and so much more.The recurring payments model is an obvious one for future development, future support and of course any extra add ons. I appreciate your comments but in my view, this is the best form plugin for all WordPress websites out there and that is why I decided to promote the developers and the product. The vendors have worked hard – and as a user of all the addons in pro you can save over £350 a year against other shall we say, more well known form builders.